
Mystery Leak's 99 3.0 Newbie Trainer
#1
 10-03-2012

Thread Starter
|
Member

Joined: Aug 2011
Posts: 12
Likes: 0
From: Albany, NY
Mystery Leak's 99 3.0 Newbie Trainer
I go by Mystery Leak on TRS. This is a summary of my project over there. I just recently sold the truck and I have the new parts up for sale.
5/30/11
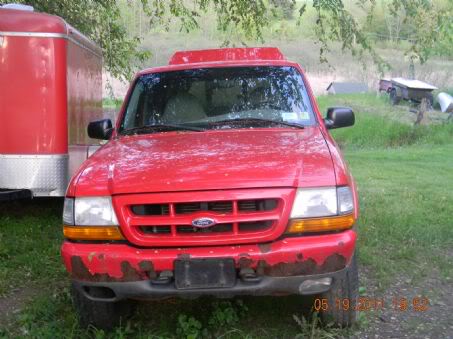
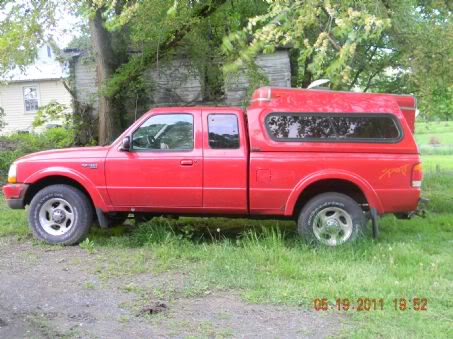
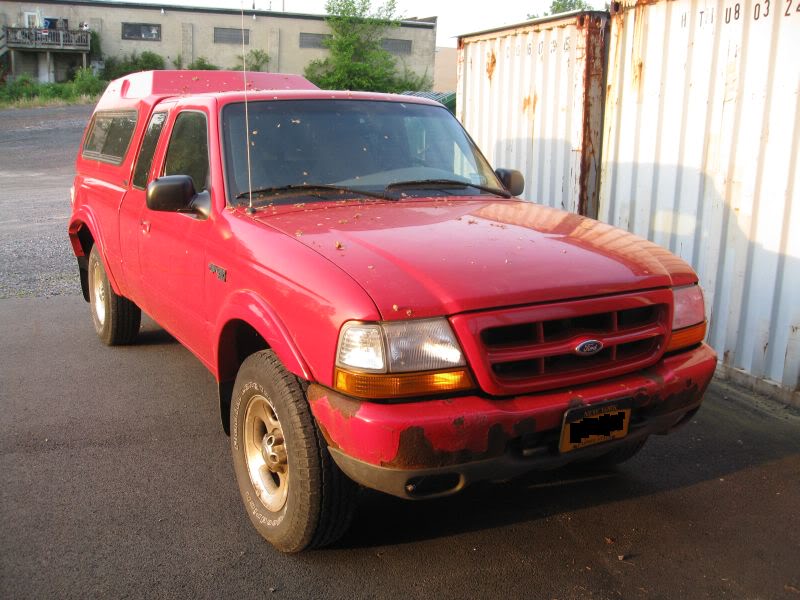
I got this little gem on the WantAdDigest.com for $500. It's a 1999 Ranger XLT 4x4 with 3.0L Flex Fuel V6, automatic. I'm new to engine repair, so this is going to be my low-cost trainer.
Problems
Mystery Leak - It was advertised as needing heads or possibly just head gaskets. I spoke to the guy and he said there's a coolant leak. There are no puddles underneath the engine and no coolant in the oil and it's not billowing white smoke. It's also not taking in coolant from the overflow tank either. A mechanic told him to put a rag on the tailpipe and see if it smelled like coolant which it did, so there's some sort of internal leak. Before I drove it, I opened up the radiator and made sure the coolant was topped off. The water temp stayed normal for the trip back. I also had the windows open and heater cranked to max for some added insurance.
176k mi - This engine has seen better days. It runs rough and lacks power. It was a struggle to keep up with traffic. I don't know if it was the engine or the tranny or both. I'm hoping a healthy 3.0 has more power than this one.
ABS Light - it was on for the whole trip.
DTC P0305 - I hooked a scanner up to it and throughout the trip it'd blip P0305 Misfire on Cylinder 5
Intermittent Oil Pressure - I checked the oil level before I left and it was normal. About halfway through the trip, I hit the overdrive lockout button and soon after that, the oil pressure gauge started to spaz out and then flat-lined. I was worried that I lost the oil pump so I pulled over turned the engine off, waited a few minutes and then started it back up. The rest of the way back, it was still spazzy so I kept extra light on the throttle to keep the gauge normal.
Whine - heard a constant whining noise throughout the trip. Not sure what it was.
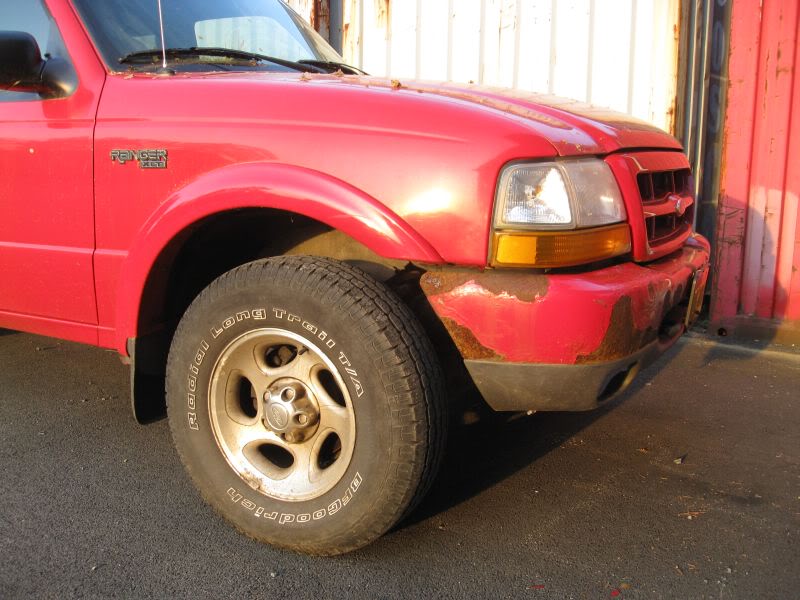
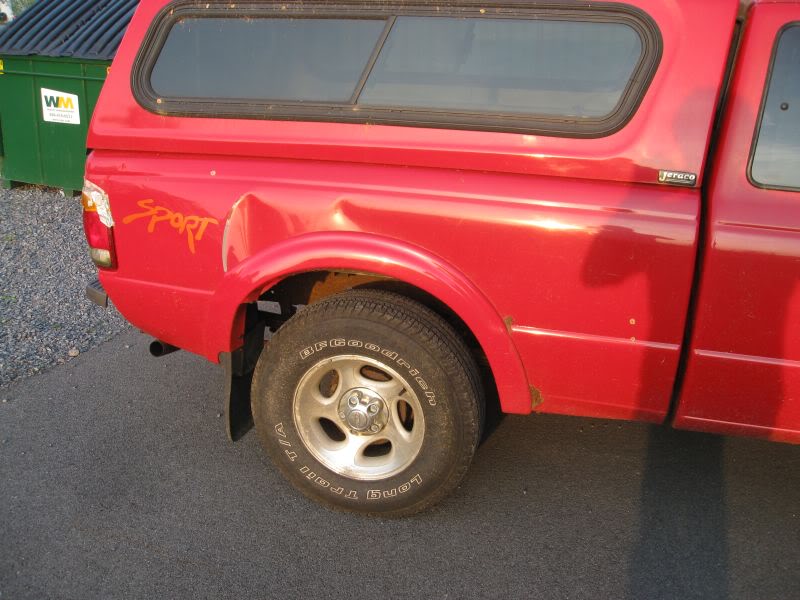
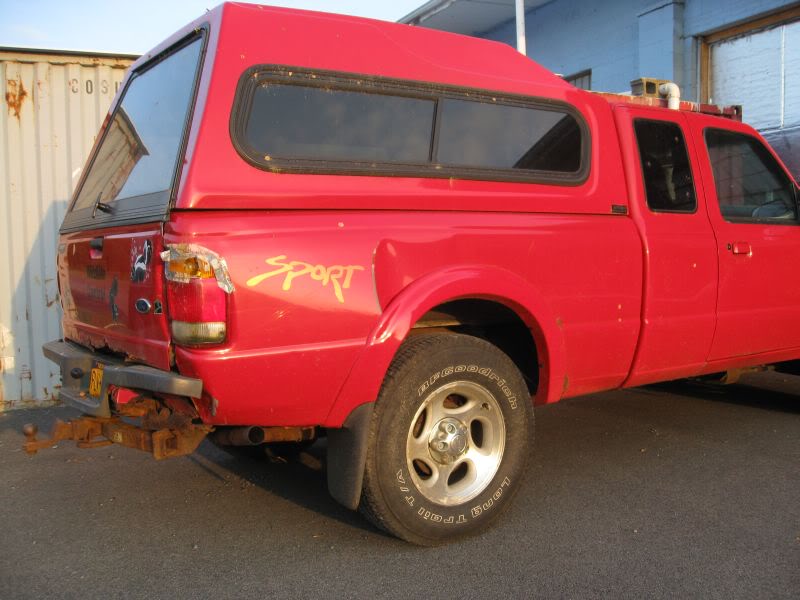
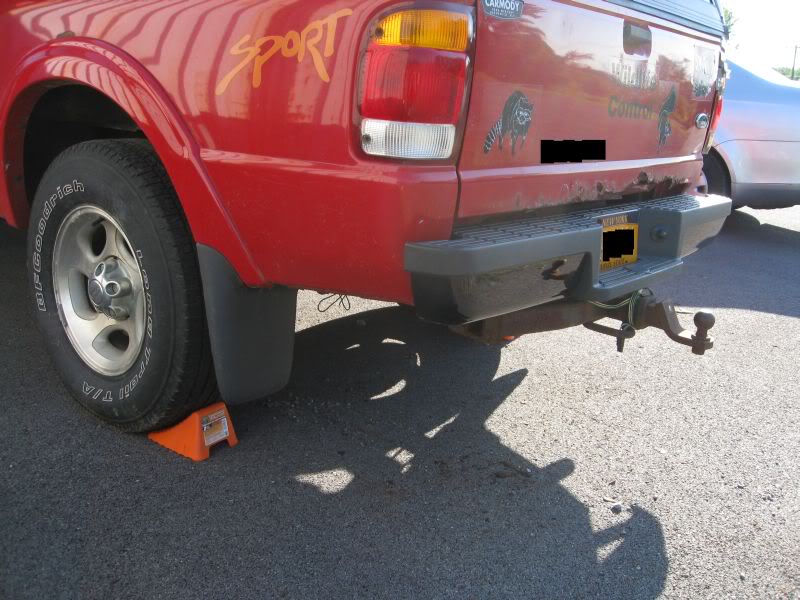
Body - The cab in great condition with very little rust. The paint is pealing off the front bumper and the rear has nearly disintegrated. The bed got rear-ended on the right side, so it's got a good crunch in it. The tailgate is frozen shut as a result. The handle is broke on one side and the latches seem to be frozen. The fiberglass cap latch is busted too, so it won't shut or lock.
5/30/11
I got this little gem on the WantAdDigest.com for $500. It's a 1999 Ranger XLT 4x4 with 3.0L Flex Fuel V6, automatic. I'm new to engine repair, so this is going to be my low-cost trainer.
Problems
Mystery Leak - It was advertised as needing heads or possibly just head gaskets. I spoke to the guy and he said there's a coolant leak. There are no puddles underneath the engine and no coolant in the oil and it's not billowing white smoke. It's also not taking in coolant from the overflow tank either. A mechanic told him to put a rag on the tailpipe and see if it smelled like coolant which it did, so there's some sort of internal leak. Before I drove it, I opened up the radiator and made sure the coolant was topped off. The water temp stayed normal for the trip back. I also had the windows open and heater cranked to max for some added insurance.
176k mi - This engine has seen better days. It runs rough and lacks power. It was a struggle to keep up with traffic. I don't know if it was the engine or the tranny or both. I'm hoping a healthy 3.0 has more power than this one.
ABS Light - it was on for the whole trip.
DTC P0305 - I hooked a scanner up to it and throughout the trip it'd blip P0305 Misfire on Cylinder 5
Intermittent Oil Pressure - I checked the oil level before I left and it was normal. About halfway through the trip, I hit the overdrive lockout button and soon after that, the oil pressure gauge started to spaz out and then flat-lined. I was worried that I lost the oil pump so I pulled over turned the engine off, waited a few minutes and then started it back up. The rest of the way back, it was still spazzy so I kept extra light on the throttle to keep the gauge normal.
Whine - heard a constant whining noise throughout the trip. Not sure what it was.
Body - The cab in great condition with very little rust. The paint is pealing off the front bumper and the rear has nearly disintegrated. The bed got rear-ended on the right side, so it's got a good crunch in it. The tailgate is frozen shut as a result. The handle is broke on one side and the latches seem to be frozen. The fiberglass cap latch is busted too, so it won't shut or lock.
Last edited by WC Ranger; 10-03-2012 at 11:21 AM.
#2
10-03-2012
Thread Starter
|
Member
Joined: Aug 2011
Posts: 12
Likes: 0
From: Albany, NY
6/3/11
Been doing a ton of window shopping at ebay, craigslist, wantaddigest, NAPA and SUMMIT while I plan out the next stage of the build. Here are some things I bought:

Ford OEM PATS Transponder Chip Key Blank
Wolf Security Hardware on ebay
$13.95 + Free Shipping

Remanufactured 3.0L V6 OHV Heads
Dover Cylinder Heads on ebay
$200 + Free Shipping
I think I'll work on the cooling system while I wait for the heads to come in. After I drain the coolant, I'll flush the system and then replace the water pump and thermostat. Maybe I'll throw in some new hoses and sensors too. The NAPA down the road is gonna be seeing a lot of me over the next few weeks.
Parts Shopping
Been doing a ton of window shopping at ebay, craigslist, wantaddigest, NAPA and SUMMIT while I plan out the next stage of the build. Here are some things I bought:
Ford OEM PATS Transponder Chip Key Blank
Wolf Security Hardware on ebay
$13.95 + Free Shipping
Remanufactured 3.0L V6 OHV Heads
Dover Cylinder Heads on ebay
$200 + Free Shipping
Heads are Totally Rebuilt from Premium Castings, and have been Upgraded with Tungsten Carbide Alloy Exhaust Valve Seats to eliminate the exhaust valve seat recession problems common to the Ranger trucks. All components have been thoroughly cleaned, inspected, and replaced where necessary. All heads are machined in our facility using State-of-the-Art equipment and procedures. All heads are assembled with High-Temp Viton valve stem seals and thoroughly tested to ensure optimum operation of all components. Heads are completely assembled and ready to bolt on.
#3
10-03-2012
Thread Starter
|
Member
Joined: Aug 2011
Posts: 12
Likes: 0
From: Albany, NY
6/10/11
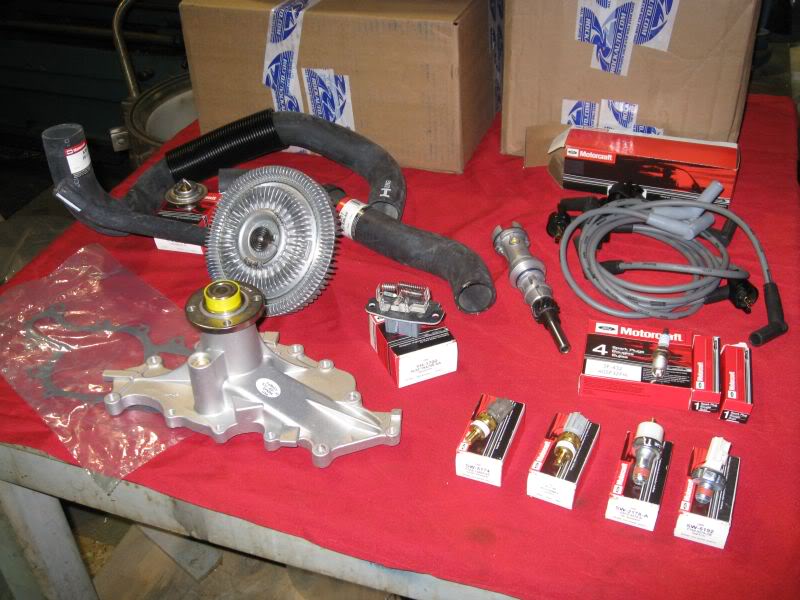
I changed my mind and went with RockAuto instead. I like how they offer Motorcraft parts at reasonable prices. I got radiator hoses ($54), a thermostat ($9), radiator fan clutch ($107), water pump ($109), blower motor resistor ($18), camshaft synchronizer ($96), new spark plugs ($22) and wires ($28), misc oil pressure switches and water temp sensors. My shopping spree ended up setting me back around $500.

My heads came in from Dover Cylinder Heads. I have a Flex Fuel 3.0 and these are the non-flex heads (F6DE-GC castings). The guys at Dover said they would be compatible, so I'll just take my chances and install them. I'll let you all know if anything goes wrong.
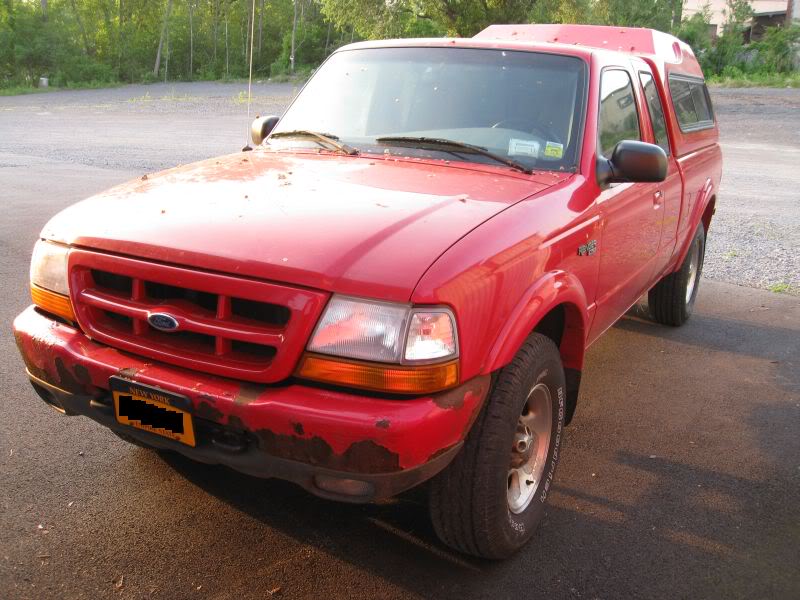
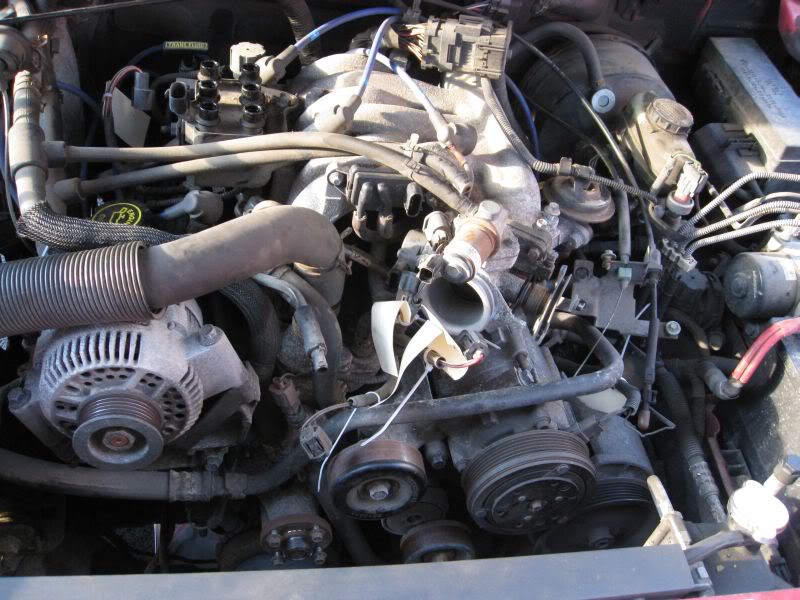
Here are some random pics I took of the truck. These will be the BEFORE pictures.

I changed my mind and went with RockAuto instead. I like how they offer Motorcraft parts at reasonable prices. I got radiator hoses ($54), a thermostat ($9), radiator fan clutch ($107), water pump ($109), blower motor resistor ($18), camshaft synchronizer ($96), new spark plugs ($22) and wires ($28), misc oil pressure switches and water temp sensors. My shopping spree ended up setting me back around $500.
My heads came in from Dover Cylinder Heads. I have a Flex Fuel 3.0 and these are the non-flex heads (F6DE-GC castings). The guys at Dover said they would be compatible, so I'll just take my chances and install them. I'll let you all know if anything goes wrong.
Here are some random pics I took of the truck. These will be the BEFORE pictures.
#4
10-03-2012
Thread Starter
|
Member
Joined: Aug 2011
Posts: 12
Likes: 0
From: Albany, NY
6/14/11
I took one look at the location of the Camshaft Synchro and decided to quit while I was ahead. The thing is buried deep below and behind the intake under a big bundle of wires. I'll do the job when I replace the heads. Right now, there's just too much stuff in the way!
On a different note, I finally found someone to cut my PATS key. I tried Home Depot a week ago and the kid there said he wasn't allowed to cut keys with transponders. Then I tried at the ACE Hardware and they said they don't do it either. The guy at ACE recommended a locksmith the next town over, they were closed by the time I got there, so I was rather annoyed and called it a night.

Today, I went to a different locksmith to see if he could do it. As I was waiting in line, I saw that they had the STRATTEC bags plastered all over the wall along with their key blanks. When it was my turn, I asked the lady if she could cut my key, she asked if I had two keys and I said yes to which she answered yes. (You can program a new key in your truck if you have two keys. If you only have one you're outta luck and you have to go to the dealership and pay them around $80 for them to reprogram your PATS computer.) She said she had the same blanks too and that they cost $20. It cost me $5.40 to cut the key and $13.95 for the key off of ebay ... I guess I didn't save all that much. In any case, I got me my new good luck charm and it comes complete with Ford Logo and PATS security chip!
I took one look at the location of the Camshaft Synchro and decided to quit while I was ahead. The thing is buried deep below and behind the intake under a big bundle of wires. I'll do the job when I replace the heads. Right now, there's just too much stuff in the way!
On a different note, I finally found someone to cut my PATS key. I tried Home Depot a week ago and the kid there said he wasn't allowed to cut keys with transponders. Then I tried at the ACE Hardware and they said they don't do it either. The guy at ACE recommended a locksmith the next town over, they were closed by the time I got there, so I was rather annoyed and called it a night.
Today, I went to a different locksmith to see if he could do it. As I was waiting in line, I saw that they had the STRATTEC bags plastered all over the wall along with their key blanks. When it was my turn, I asked the lady if she could cut my key, she asked if I had two keys and I said yes to which she answered yes. (You can program a new key in your truck if you have two keys. If you only have one you're outta luck and you have to go to the dealership and pay them around $80 for them to reprogram your PATS computer.) She said she had the same blanks too and that they cost $20. It cost me $5.40 to cut the key and $13.95 for the key off of ebay ... I guess I didn't save all that much. In any case, I got me my new good luck charm and it comes complete with Ford Logo and PATS security chip!
#5
10-03-2012
Thread Starter
|
Member
Joined: Aug 2011
Posts: 12
Likes: 0
From: Albany, NY
#6
10-03-2012
Thread Starter
|
Member
Joined: Aug 2011
Posts: 12
Likes: 0
From: Albany, NY
6/30/11
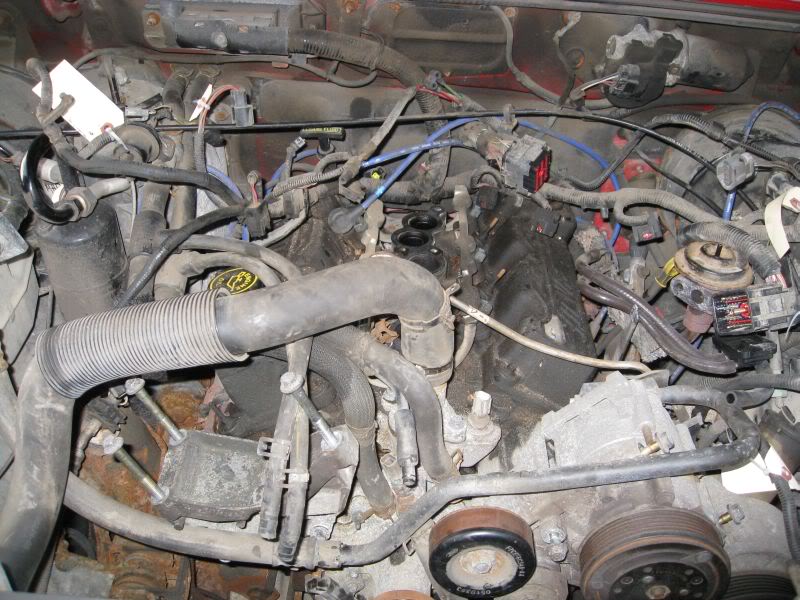
I finally started tearing into the engine after work today.
This is my first time working on an engine so I did a lot of things for the first time today. I warmed up the car for 15 minutes and then unscrewed the plug in to bottom of the oil pan and watched the oil drain out. I missed the bowl a few times, so I'm glad I bought the extra large "pizza pan" splash tray. I managed to save the driveway from oil stains, but the antifreeze was a whole nother story.
I didn't know where to drain the coolant from. It's a good thing I had my computer up and running. I did a quick search on TRS and found this thread -->Radiator Drain Plug? - The Ranger Station Forums<-- with pictures too. I tried the stopcock, but only a few drips came out. I'll bet it was all filled up with crud. When I opened the radiator cap, it was covered with what looked like mud. Not sure how that got in there. Anyways, I decided to use the shortcut that mixwell suggested and started to drop the bottom radiator hose.
The hose was almost off when the coolant came out as a small jet, missing my catch basin, and my drip pan and landed on the driveway. I pushed it back on and off trying to varying the size of the jet. I kept missing my target and worse yet, I felt like I was milking a green cow. Finally I threw a rag over the works and gave it a good tug. Most of the coolant drained in the pan and rest, well, became my cologne.
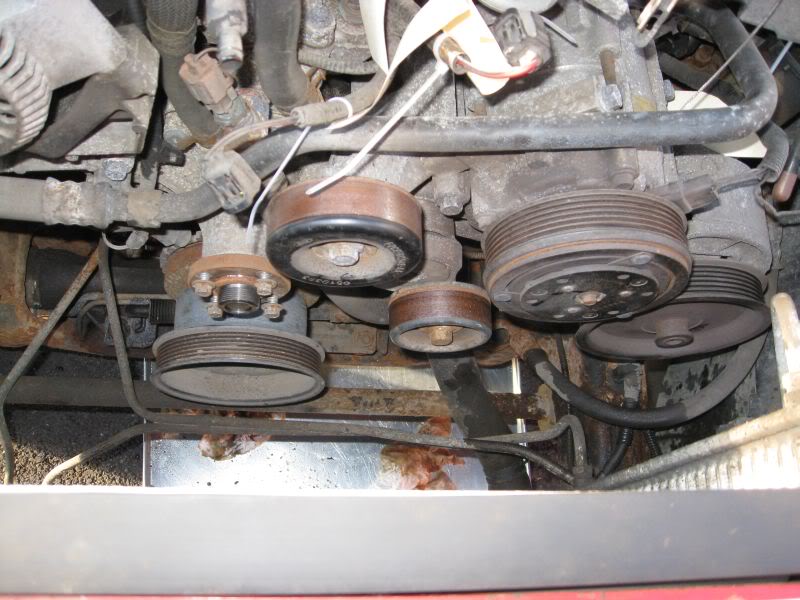
I found a good writeup on how to remove the serpentine belt and stuff on -->3.0 Underdog Pulleys install<--. It just happened to pop up on the 3.0 forum the other day. This link -->Remove Fan from Water Pump<-- gives another visual for using the radiator clutch removal tool. You only use the crows foot from the kit. I wish they would sell that tool alone. When loosening the 10mm bolts on the fan pulley, I found it useful to put pressure on the socket or bolt with a finger so I could get the socket wrench to ratchet. It's kinda obvious, but it didn't seem so, when the bolt and socket were hidden by the pulley and it stopped ratcheting after the first few turns.
I also didn't know you could release the belt tensioner with just a regular 15mm wrench. Saved me from having to buy a serpentine belt tool.
After I got the fan clutch off, I pulled that, the fan and the radiator shroud off and called it a day.
I finally started tearing into the engine after work today.
This is my first time working on an engine so I did a lot of things for the first time today. I warmed up the car for 15 minutes and then unscrewed the plug in to bottom of the oil pan and watched the oil drain out. I missed the bowl a few times, so I'm glad I bought the extra large "pizza pan" splash tray. I managed to save the driveway from oil stains, but the antifreeze was a whole nother story.
I didn't know where to drain the coolant from. It's a good thing I had my computer up and running. I did a quick search on TRS and found this thread -->Radiator Drain Plug? - The Ranger Station Forums<-- with pictures too. I tried the stopcock, but only a few drips came out. I'll bet it was all filled up with crud. When I opened the radiator cap, it was covered with what looked like mud. Not sure how that got in there. Anyways, I decided to use the shortcut that mixwell suggested and started to drop the bottom radiator hose.
The hose was almost off when the coolant came out as a small jet, missing my catch basin, and my drip pan and landed on the driveway. I pushed it back on and off trying to varying the size of the jet. I kept missing my target and worse yet, I felt like I was milking a green cow. Finally I threw a rag over the works and gave it a good tug. Most of the coolant drained in the pan and rest, well, became my cologne.
I found a good writeup on how to remove the serpentine belt and stuff on -->3.0 Underdog Pulleys install<--. It just happened to pop up on the 3.0 forum the other day. This link -->Remove Fan from Water Pump<-- gives another visual for using the radiator clutch removal tool. You only use the crows foot from the kit. I wish they would sell that tool alone. When loosening the 10mm bolts on the fan pulley, I found it useful to put pressure on the socket or bolt with a finger so I could get the socket wrench to ratchet. It's kinda obvious, but it didn't seem so, when the bolt and socket were hidden by the pulley and it stopped ratcheting after the first few turns.
I also didn't know you could release the belt tensioner with just a regular 15mm wrench. Saved me from having to buy a serpentine belt tool.
After I got the fan clutch off, I pulled that, the fan and the radiator shroud off and called it a day.


#10
10-04-2012
Thread Starter
|
Member
Joined: Aug 2011
Posts: 12
Likes: 0
From: Albany, NY
Tell me about it ... the guy I sold it to chained a tow bar to the front bumper. I was just waiting for the thing to fly off.
Thanks!
Thanks! I sold my truck so I don't need any parts right now. If I do another 3.0 project, I'll know where to start looking.
Thanks!
Thanks! I sold my truck so I don't need any parts right now. If I do another 3.0 project, I'll know where to start looking.
#11
10-05-2012
Thread Starter
|
Member
Joined: Aug 2011
Posts: 12
Likes: 0
From: Albany, NY
7/3/2011
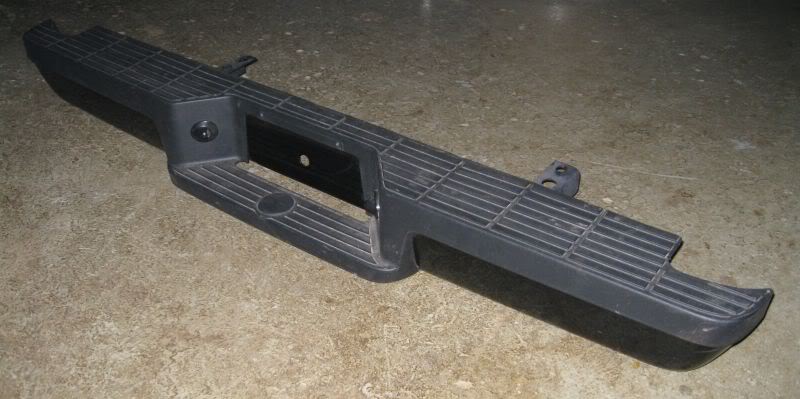

I headed over to Hoosick Falls yesterday to pick up a new bumper for the truck. Craigslist said it was a complete rear ford bumper - includes top step pad, black bumper bar, license plate lights and right and left bumper brackets. It's from a 2008 Ranger and is practically brand new. I bought it for $175.

Guess I'm gonna have to add brake lines to the list of things to fix.
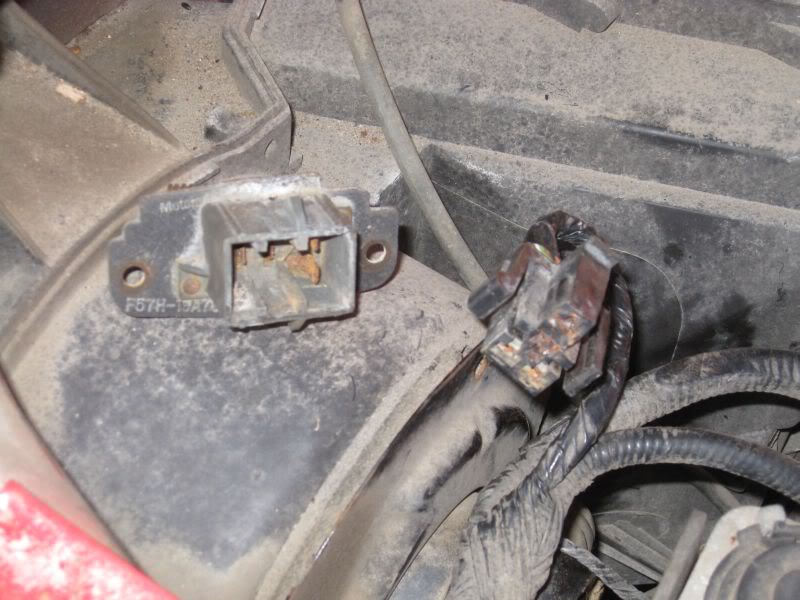
Speeds 1 & 2 on my Climate Control aren't working. It only blows air on Speeds 3 & 4. This happened on my old F-150, so I figured it was just a matter of replacing the blower motor resistor. I couldn't get the connector off the resistor, so I took it out still connected. From there it took three small screwdrivers, an awl, a claw hammer and the better part of a half hour to get them apart. Looks like the contacts welded themselves together. Not going to be an easy fix.
Removed Alternator, Coil Pack, Upper Intake Manifold and Throttle Body. Disconnected Wire Harness and Vacuum Lines. Removed Fuel Line from Fuel Injector Rail using a Fuel Line Tool
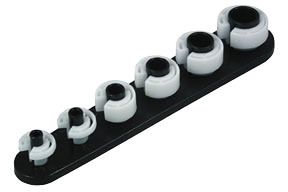
AC/Fuel Line Disconnect Tool Set
Lisle model# 37000
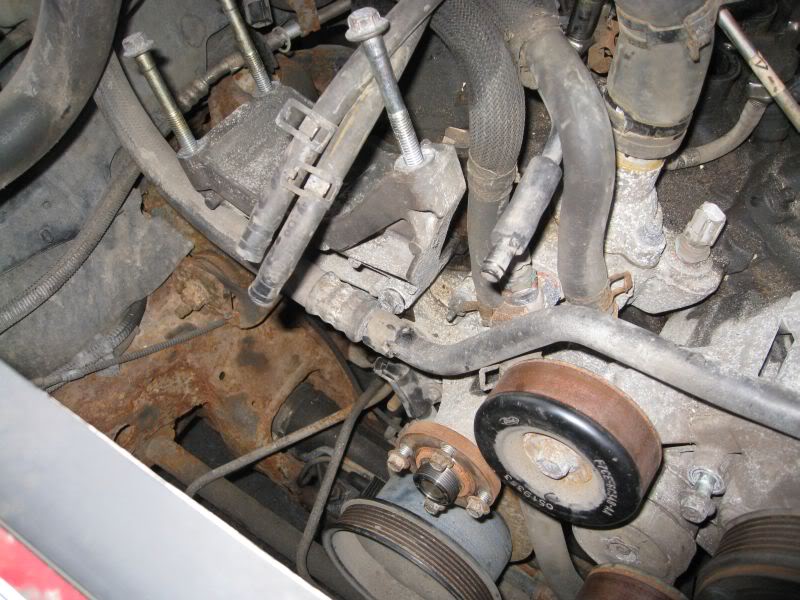
Got stumped by the bloody A/C Hose Mounting Tab which seems to have been mangled. Couldn't seem to fit a wrench or socket on it. Couldn't remove the A/C Compressor or the Alternator Bracket with that in the way.
Managed to get the A/C Hose off by drilling through the pop rivet holding the Mounting Tab together. Removed the Mounting Tab still attached to the Water Pump stud.
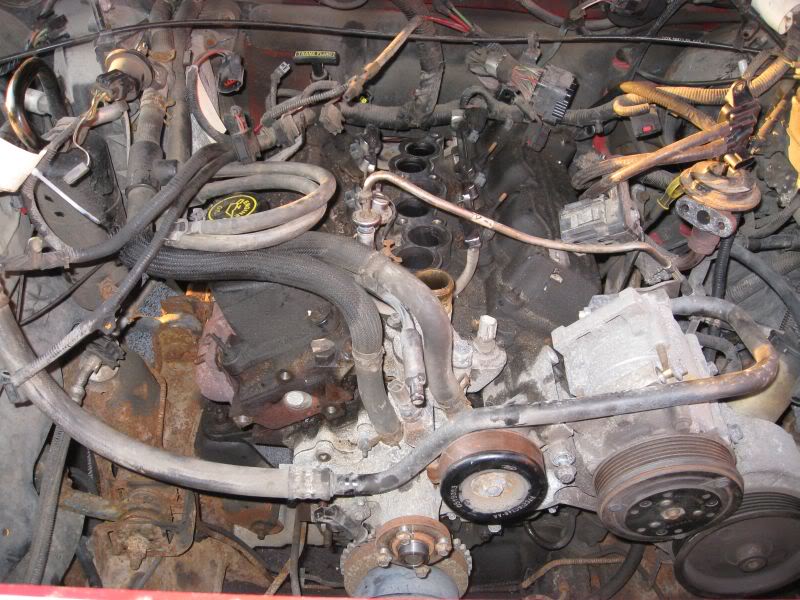
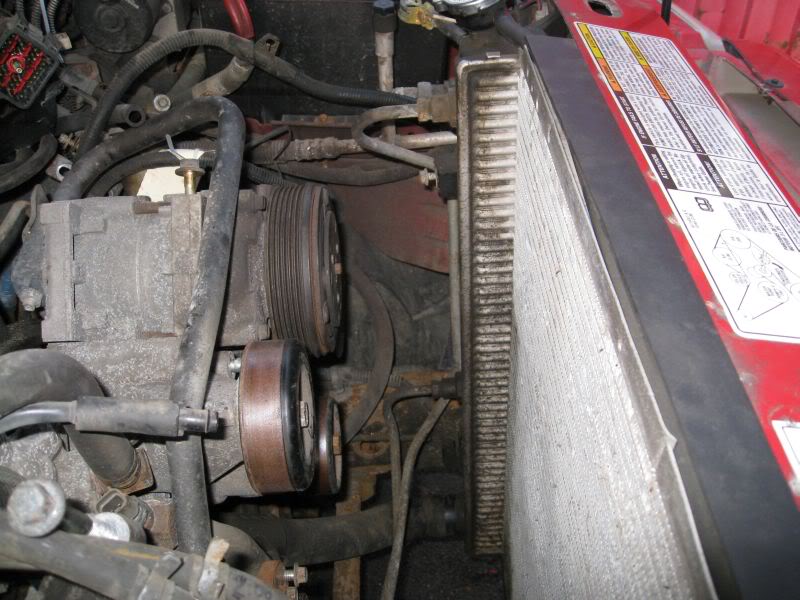
With that out of the way, I was able to remove the last bolt holding the Alternator Bracket. I also removed the Radiator, Upper and Lower Radiator Hoses, Spark Plug Wires and Belt Tensioner.
I used a metric open end box wrench when undoing the transmission cooling lines. I used a large adjustable wrench to hold the larger fitting, while I used the open end to undo the compression fitting. I was worried about fluid dripping out of the lines, but hardly anything dripped out when they were disconnected.
I headed over to Hoosick Falls yesterday to pick up a new bumper for the truck. Craigslist said it was a complete rear ford bumper - includes top step pad, black bumper bar, license plate lights and right and left bumper brackets. It's from a 2008 Ranger and is practically brand new. I bought it for $175.
Guess I'm gonna have to add brake lines to the list of things to fix.
Speeds 1 & 2 on my Climate Control aren't working. It only blows air on Speeds 3 & 4. This happened on my old F-150, so I figured it was just a matter of replacing the blower motor resistor. I couldn't get the connector off the resistor, so I took it out still connected. From there it took three small screwdrivers, an awl, a claw hammer and the better part of a half hour to get them apart. Looks like the contacts welded themselves together. Not going to be an easy fix.
Removed Alternator, Coil Pack, Upper Intake Manifold and Throttle Body. Disconnected Wire Harness and Vacuum Lines. Removed Fuel Line from Fuel Injector Rail using a Fuel Line Tool
AC/Fuel Line Disconnect Tool Set
Lisle model# 37000
Got stumped by the bloody A/C Hose Mounting Tab which seems to have been mangled. Couldn't seem to fit a wrench or socket on it. Couldn't remove the A/C Compressor or the Alternator Bracket with that in the way.
Managed to get the A/C Hose off by drilling through the pop rivet holding the Mounting Tab together. Removed the Mounting Tab still attached to the Water Pump stud.
With that out of the way, I was able to remove the last bolt holding the Alternator Bracket. I also removed the Radiator, Upper and Lower Radiator Hoses, Spark Plug Wires and Belt Tensioner.
I used a metric open end box wrench when undoing the transmission cooling lines. I used a large adjustable wrench to hold the larger fitting, while I used the open end to undo the compression fitting. I was worried about fluid dripping out of the lines, but hardly anything dripped out when they were disconnected.
#12
10-05-2012
Member
Joined: Jun 2011
Posts: 1,236
Likes: 1
From: glastonbury, ct
#14
10-11-2012
Thread Starter
|
Member
Joined: Aug 2011
Posts: 12
Likes: 0
From: Albany, NY
7/22/11

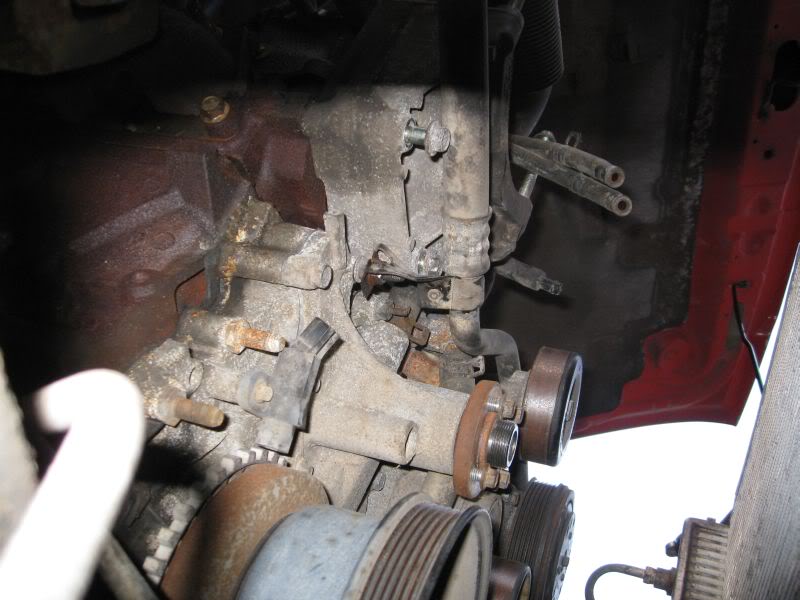
Rented a Power Steering Pulley Puller from Autozone and removed the Pulley. Removed AC/PS Bracket. You can see what tools they've got for renting here. Basically you buy the item and then return it for a refund when you're done.
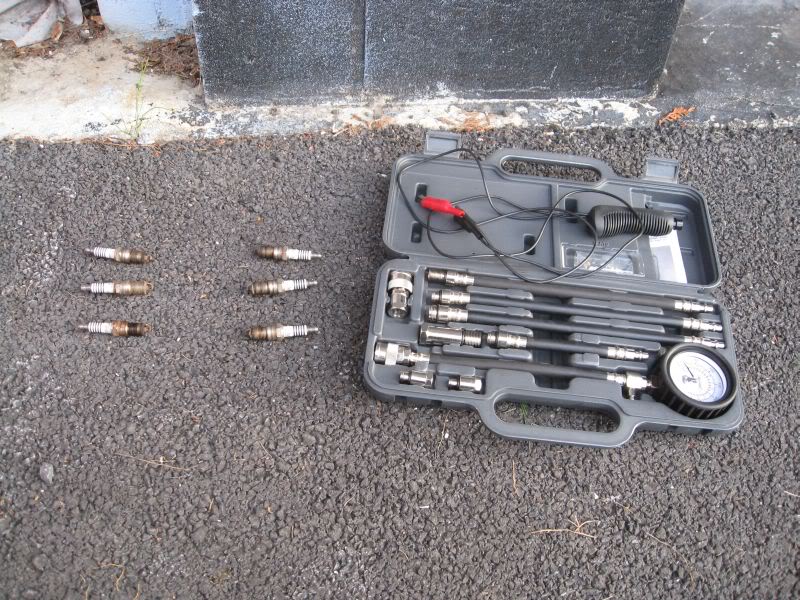
Pulled the plugs and did a compression test. The remote starter switch came in really handy.
Ford sure makes it tough to get to the starter relay. They mounted it on the starter, so I had to crawl under and find the ignition terminal by braille. I wasn't able to warm up the engine since it's in pieces right now - but the results of the wet and dry compression tests seem to show that the cylinders and rings are Ok.
Cylinders 2&3 are low. I'll bet that's where the leaks are!
Not sure why Cylinders 1&4 are so much higher. Carbon buildup maybe?
Compression Test Results (psi)
1) Dry 193, 197
Wet 201, 203
2) Dry 115, 115
Wet 126, 111
3) Dry 129, 123
Wet 111, 111
4) Dry 195, 190
Wet 190, 196
5) Dry 158, 160
Wet 165, 168
6) Dry 157, 158
Wet 168, 164
Notes:
- Engine was cold.
- Did way more than recommended 5 pulses, basically kept running until needle stopped moving.
- Ran the battery down too much, wet test results may be off. Had to run with 30A battery charger on last few wet tests.
Rented a Power Steering Pulley Puller from Autozone and removed the Pulley. Removed AC/PS Bracket. You can see what tools they've got for renting here. Basically you buy the item and then return it for a refund when you're done.
Pulled the plugs and did a compression test. The remote starter switch came in really handy.
Ford sure makes it tough to get to the starter relay. They mounted it on the starter, so I had to crawl under and find the ignition terminal by braille. I wasn't able to warm up the engine since it's in pieces right now - but the results of the wet and dry compression tests seem to show that the cylinders and rings are Ok.
Cylinders 2&3 are low. I'll bet that's where the leaks are!
Not sure why Cylinders 1&4 are so much higher. Carbon buildup maybe?
Compression Test Results (psi)
1) Dry 193, 197
Wet 201, 203
2) Dry 115, 115
Wet 126, 111
3) Dry 129, 123
Wet 111, 111
4) Dry 195, 190
Wet 190, 196
5) Dry 158, 160
Wet 165, 168
6) Dry 157, 158
Wet 168, 164
Notes:
- Engine was cold.
- Did way more than recommended 5 pulses, basically kept running until needle stopped moving.
- Ran the battery down too much, wet test results may be off. Had to run with 30A battery charger on last few wet tests.
#15
10-12-2012
Member
Joined: Mar 2011
Posts: 844
Likes: 0
From: Pennsylvania
#16
10-21-2012
Thread Starter
|
Member
Joined: Aug 2011
Posts: 12
Likes: 0
From: Albany, NY
7/24/11
I picked up some Craftsman Impact sockets last week for almost half off! They came in really handy for installing my new bumper!
BEFORE

AFTER
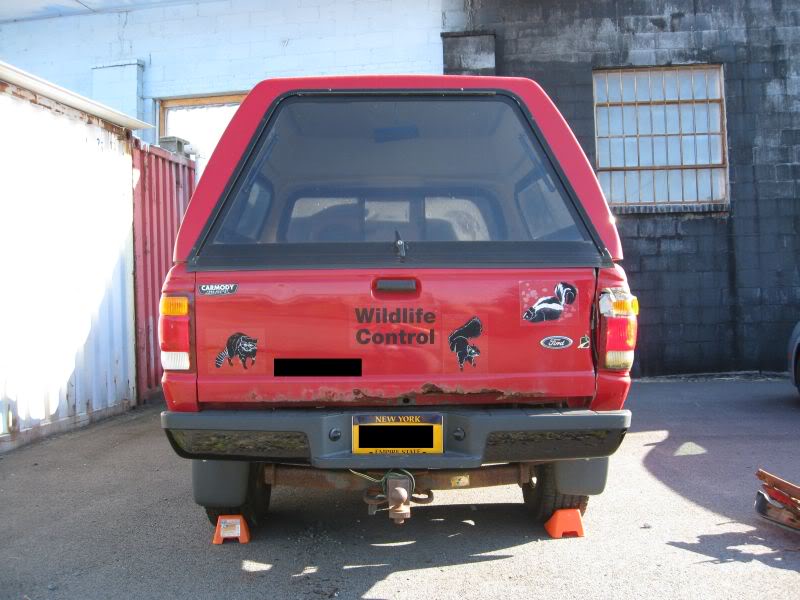
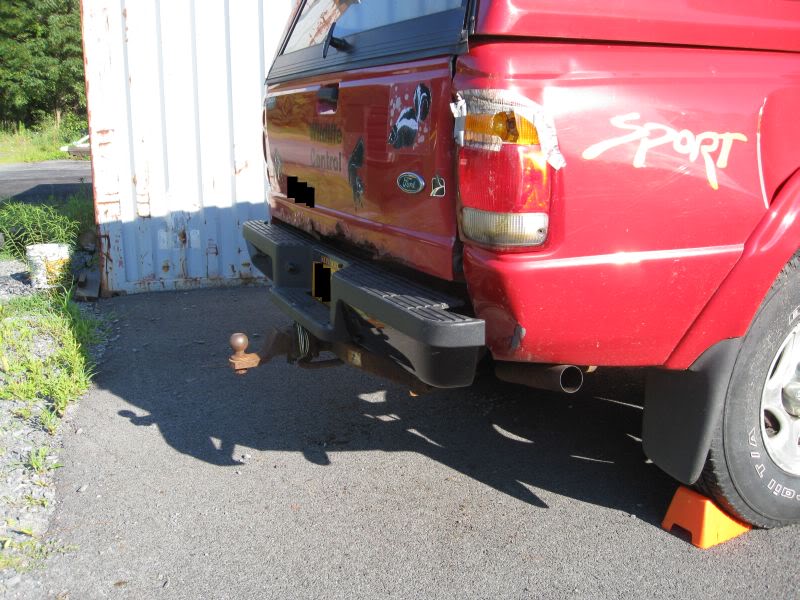
I didn't realize how much the bed was crunched up. Look how much space is between the bumper and the bed!
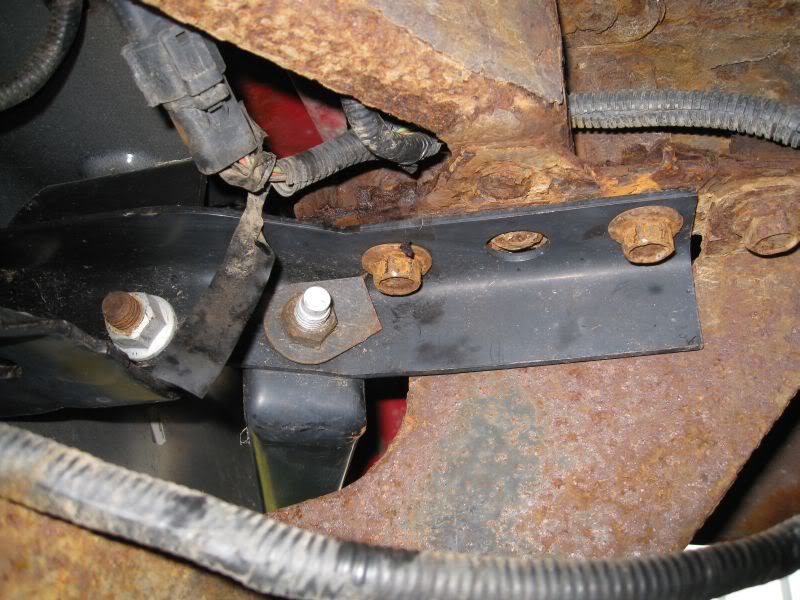
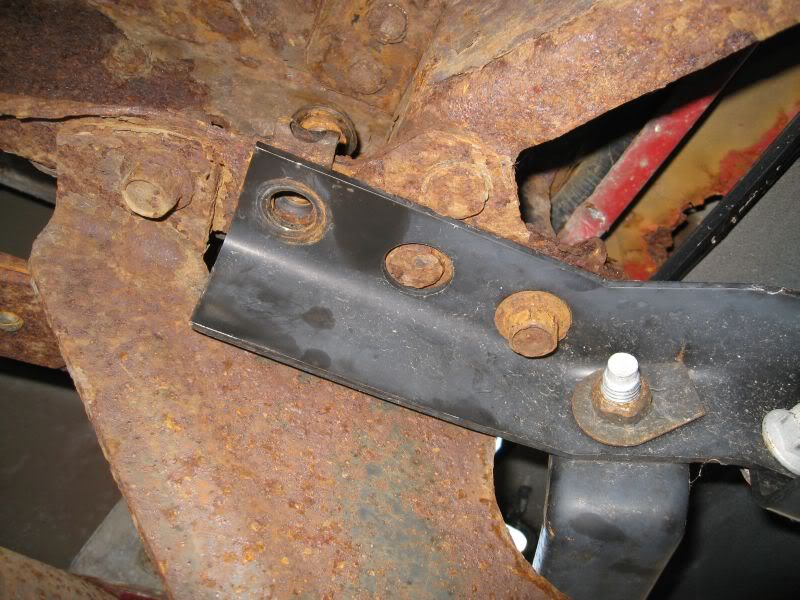
The frame alignment is slightly off. I couldn't get one of the bolts to go into the stock fastener. Guess I'll have to find a nut that fits.
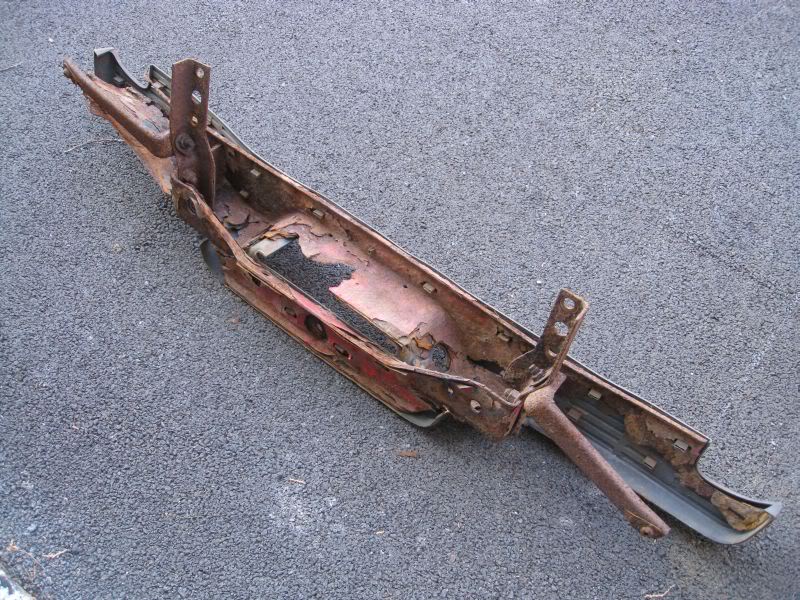
Good Bye and Good Riddance Rusty Old Bumper!!!
Besides the bolt that wouldn't go in, the only other thing I had trouble with was having to swap in my old license plate light lenses. The 08's are different and won't accept my 99's light sockets.
I picked up some Craftsman Impact sockets last week for almost half off! They came in really handy for installing my new bumper!
BEFORE
AFTER
I didn't realize how much the bed was crunched up. Look how much space is between the bumper and the bed!
The frame alignment is slightly off. I couldn't get one of the bolts to go into the stock fastener. Guess I'll have to find a nut that fits.
Good Bye and Good Riddance Rusty Old Bumper!!!
Besides the bolt that wouldn't go in, the only other thing I had trouble with was having to swap in my old license plate light lenses. The 08's are different and won't accept my 99's light sockets.
#18
11-19-2012
Thread Starter
|
Member
Joined: Aug 2011
Posts: 12
Likes: 0
From: Albany, NY
7/27/11
As I was taking the bolts off to my valve covers, I realized that I didn't have any deep sockets small enough to handle the studs. Crap!!! Moved on to plan B - replacing the water pump.

Took out the bolts and used a pair of pliars to wedge the tabs between the water pump and the timing cover. I figure that would keep from pulling on the timing cover gasket. Make sure you have something to catch the coolant when you crack the seal.
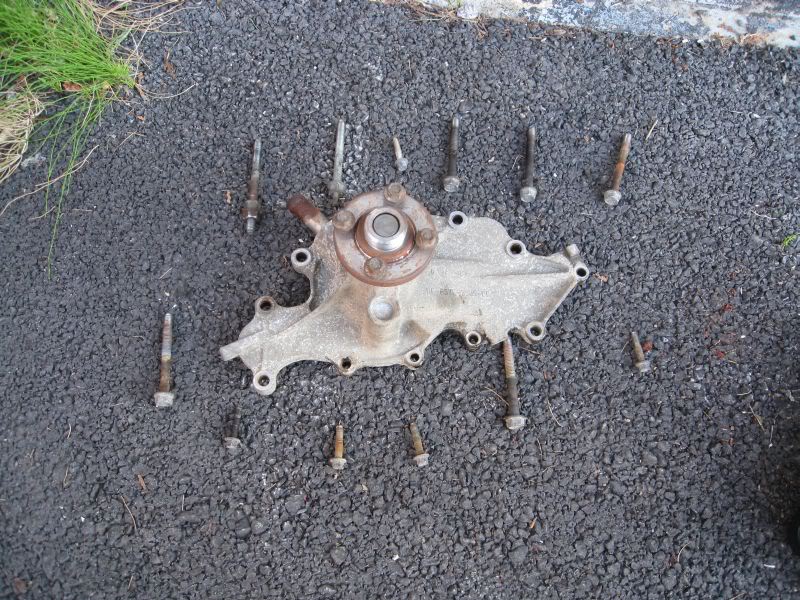
If this is the original water pump, it's in really good shape!
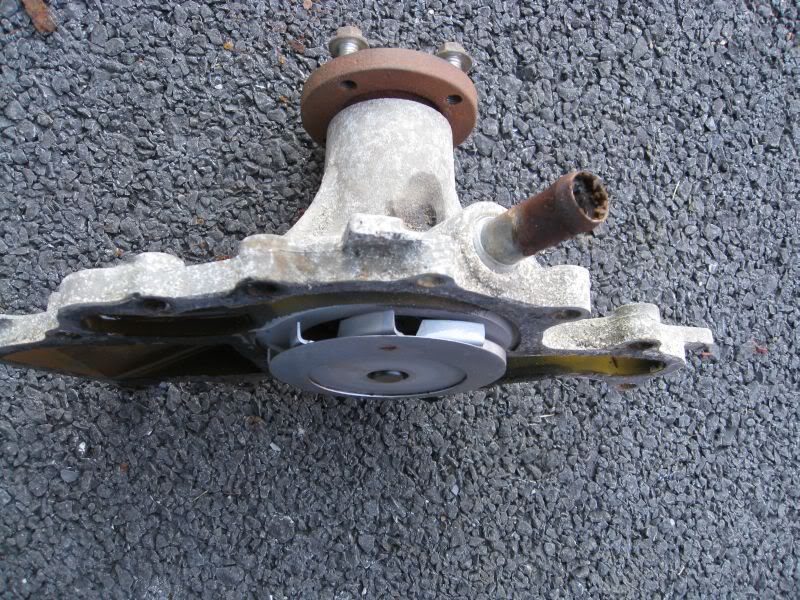
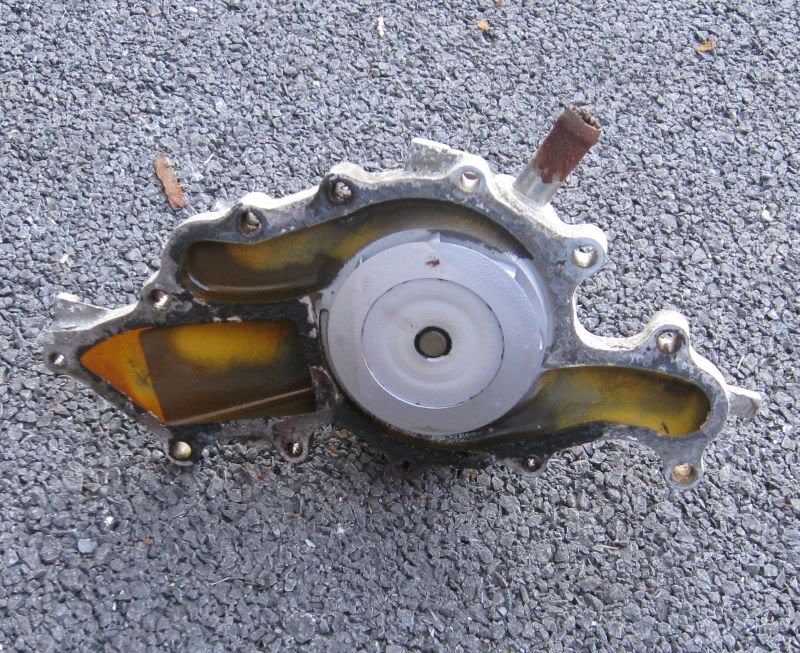
The impeller looks good too ... damn! Well I had a brand new pump, so that's what went back in.
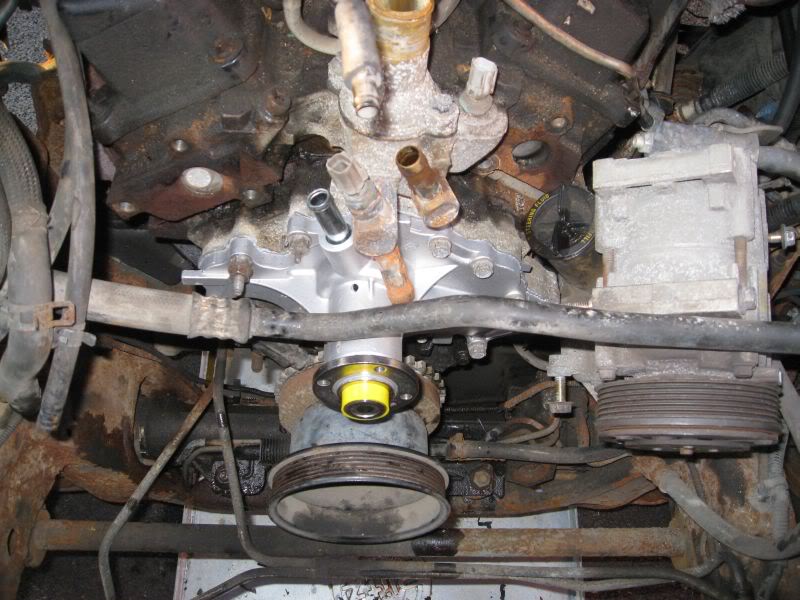
Most of the the time was spent cleaning the mating surfaces with a sharp razor blade. I put a thin coat of RTV on both surfaces, threw the gasket on the pump and mated it to the engine. Unfortunately, I busted a bolt as I was torquing the bolts down. It's the small one right below the impeller shaft. I'm going to take my chances and hope it doesn't leak.
As I was taking the bolts off to my valve covers, I realized that I didn't have any deep sockets small enough to handle the studs. Crap!!! Moved on to plan B - replacing the water pump.
Took out the bolts and used a pair of pliars to wedge the tabs between the water pump and the timing cover. I figure that would keep from pulling on the timing cover gasket. Make sure you have something to catch the coolant when you crack the seal.
If this is the original water pump, it's in really good shape!
The impeller looks good too ... damn! Well I had a brand new pump, so that's what went back in.
Most of the the time was spent cleaning the mating surfaces with a sharp razor blade. I put a thin coat of RTV on both surfaces, threw the gasket on the pump and mated it to the engine. Unfortunately, I busted a bolt as I was torquing the bolts down. It's the small one right below the impeller shaft. I'm going to take my chances and hope it doesn't leak.

Thread
Thread Starter
Forum
Replies
Last Post
awcraig
General Ford Ranger Discussion
40
02-04-2018 07:30 PM
SonicRanger001
Drivetrain Tech
6
12-22-2005 01:04 PM


