ORW COIL-OVER CONVERSION BRACKETS
#76
Very interested, and probably looking into buying this in april or may. Any other shock options? Such as King or FOA? I'm not sure who you guys carry... guess i could check the site for that haha. Either way the kit looks great!
#77
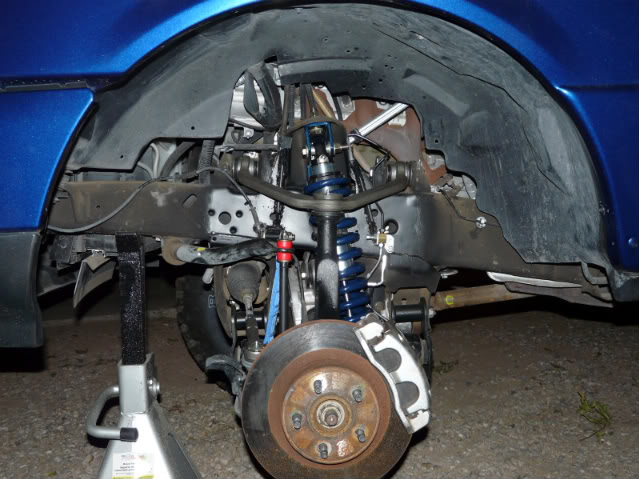
The install is even easier then that. This kit is 100% bolt on except for the shock tower gussets that require some welding. The lower shock mount is positioned so that the radiused edge fits inside the arm and is aligned with the two existing holes in arm. Then locating and drilling of the additional holes. The upper mount is positioned inside the shock tower. You'll notice two 3/8" holes on the back of the mount that require drilling to secure. Sound easy enough, right? It is also necessary to trim your existing bumpstop mount to leave enough clearence for the spring, about a 1/2". Install in about 3-4 hours.
#84
Yes, I would take Nick's advice for the coil-over's.
Last edited by KLC; 02-11-2010 at 08:55 PM.
#86
The reason that you guys are having trouble finding the kit on our website is that we plan on launching a new page with a new look and more product. So, until then to order the kit send me a PM or you can reach me at the information below:
Nick Kelleher
nick@orwmail.com
#88
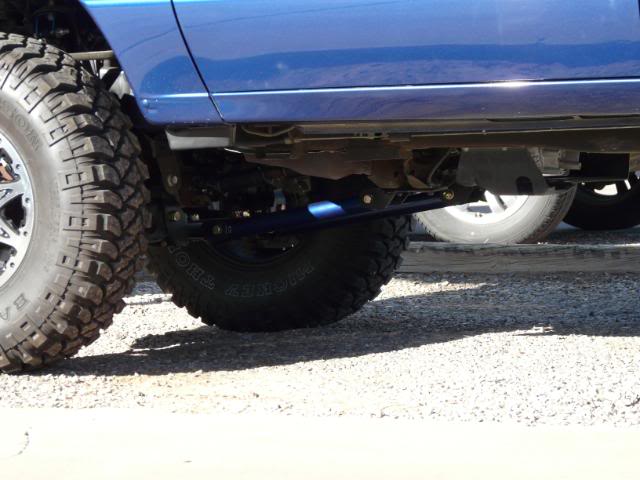
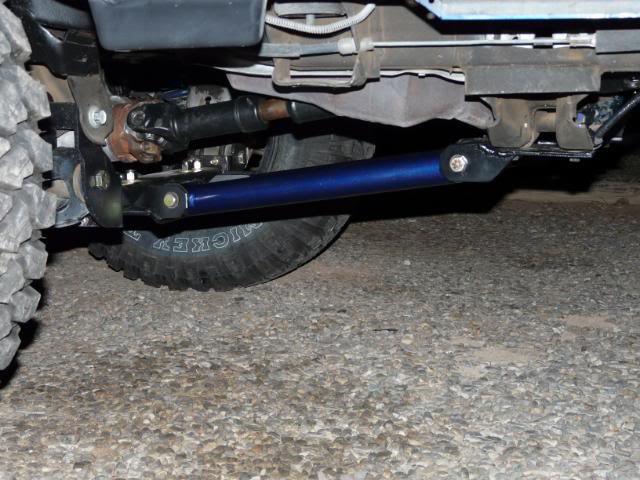
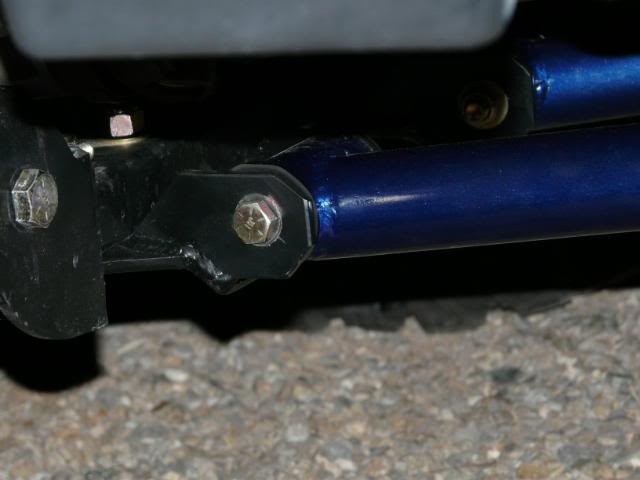
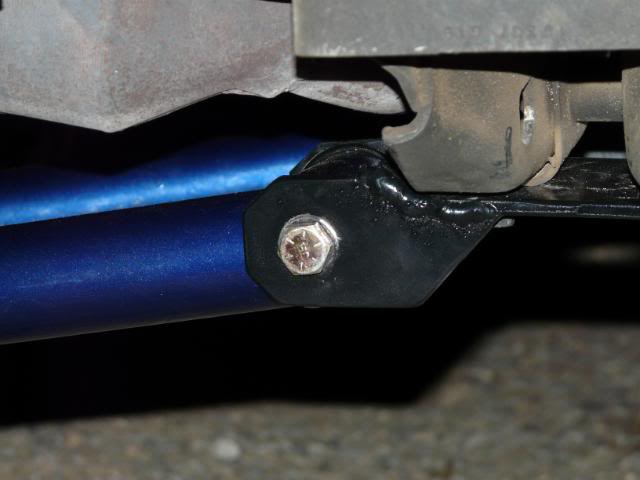
10" limit straps w/ mount and adjustable clevis:
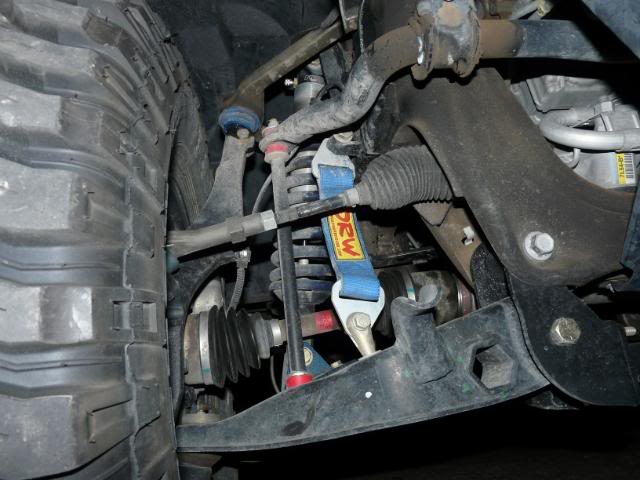
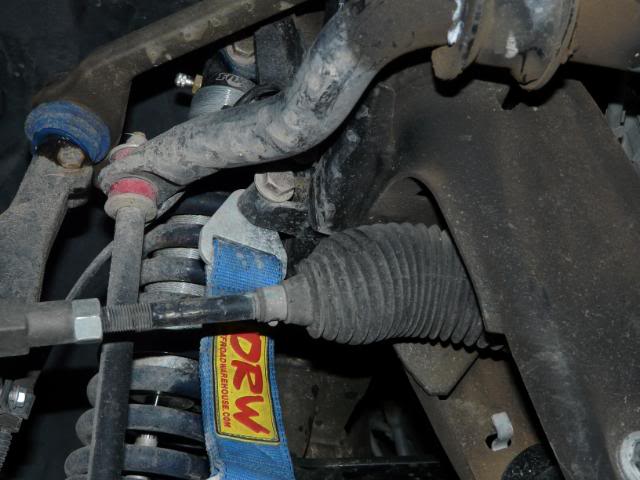
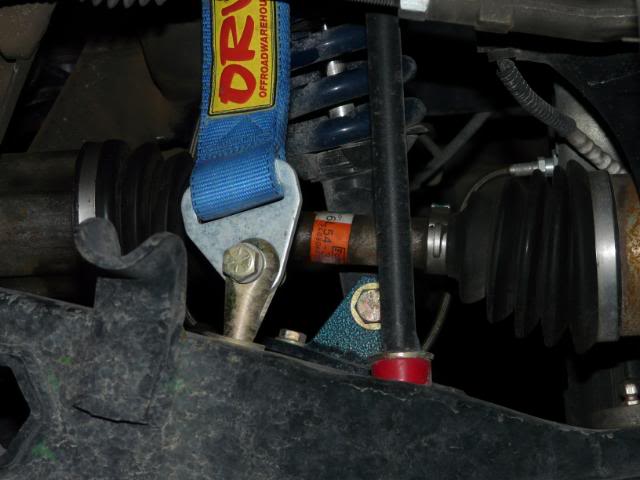
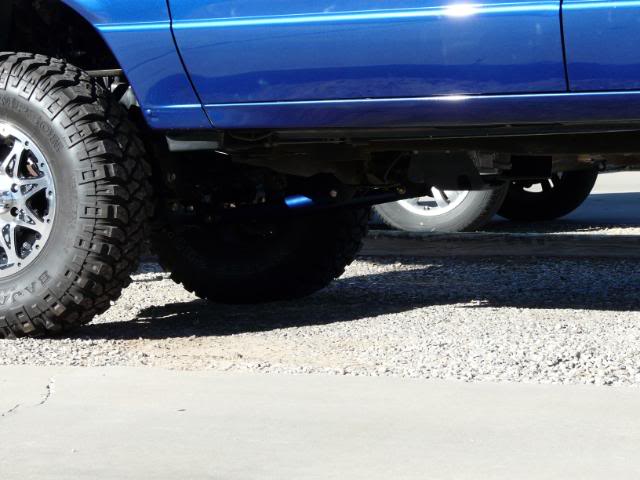
I also added custom support bars too.
#90
So just to be sure here, does the kit comes with detailed instructions as to where the mounts are to be located? Measurements?
Gussets:
How precise do they have to be?
How much give or take is safe?
Suggestions for the welding?
Mounts:
What angle degree for the upper mount?
What would be considered the perfect angle or location on the LCA?
After reading this thread, it has made me reconsider the coilover conversion. I was going to skip this and go straight for a SAS, but now, I'm leaning towards this. It's all your guys fault!

#91
So just to be sure here, does the kit comes with detailed instructions as to where the mounts are to be located? Measurements?
Gussets:
How precise do they have to be?
How much give or take is safe?
Suggestions for the welding?
Mounts:
What angle degree for the upper mount?
What would be considered the perfect angle or location on the LCA?
After reading this thread, it has made me reconsider the coilover conversion. I was going to skip this and go straight for a SAS, but now, I'm leaning towards this. It's all your guys fault!

Gussets:
How precise do they have to be?
How much give or take is safe?
Suggestions for the welding?
Mounts:
What angle degree for the upper mount?
What would be considered the perfect angle or location on the LCA?
After reading this thread, it has made me reconsider the coilover conversion. I was going to skip this and go straight for a SAS, but now, I'm leaning towards this. It's all your guys fault!

I would loosely bolt up the top mount using the original shock hole. Don't worry about drilling the two back holes yet. Next, I would install the lower mount. Go ahead and bolt up the mount using the two predrilled holes then drill and bolt up the remaining two. Now you can mock up the coilover so that you will know how to angle the top mount. Then just take the coilover back off and drill the two back top mount holes. Bolt up and tighten down everything and install the coilover.
If any of you considering the coilover conversion needs any help don't hesitate to contact me.
Last edited by KLC; 01-08-2010 at 09:20 PM.
#93
Thanks for the info. I asked these questions to hopefully get some install answers for all to see, not just for me. I had a real good idea on how to do this, but it was just in my head. It really helps to have it wrote down to use for future reference. I can now come back to this when the time is right, and others will have this to use as well. I do see that some tape the coilovers for protection from mock ups as well. Any other tips to share besides what has been covered here already?
Sharing is caring :)
Sharing is caring :)
#94
Thanks for the info. I asked these questions to hopefully get some install answers for all to see, not just for me. I had a real good idea on how to do this, but it was just in my head. It really helps to have it wrote down to use for future reference. I can now come back to this when the time is right, and others will have this to use as well. I do see that some tape the coilovers for protection from mock ups as well. Any other tips to share besides what has been covered here already?
Sharing is caring :)
Sharing is caring :)
Once you start the install everything will fall into place and make sense. Also, there are a number of different ways you can install the coilover's. The most important thing is making sure you drill the holes for the top mount at the right angle, and weld the gussets so nothing touches them.
You can weld the gussets so that they follow the angles of the stock shock bucket (like I did) or you can weld them straight up and down. You have some room to play with. Also, don't forget to cut off or trim the stock bumpstop mount; if you don't the spring will rub.
I wouldn't preadjust the preload on the coilovers before the installation. Leave the top nuts loose so that when you put on the coilover you don't have to try and compress the spring too. Then you can adjust the preload once installed. It can be done either way, but I think it's easier to do it as I explained.
Once you get the coilover's on I would add limit straps and, if desired, support bars. The limit straps are a necessity to keep everything from overextending. And, the support bars just add extra bracing for added strength.
Other than welding up the gussets, drilling a few holes, and cutting off the bumpstops, the coilover conversion is bolt-on.
#96
one last thing in the install that is missing in every thread is, a bumpstop for up travel,, you should have them or shock damage can occur when they bottom out,,
You have to make your own, I am in the process of designing a set for my Explorer, but when i get them done i will post a pic,,
You have to make your own, I am in the process of designing a set for my Explorer, but when i get them done i will post a pic,,
#97
one last thing in the install that is missing in every thread is, a bumpstop for up travel,, you should have them or shock damage can occur when they bottom out,,
You have to make your own, I am in the process of designing a set for my Explorer, but when i get them done i will post a pic,,
You have to make your own, I am in the process of designing a set for my Explorer, but when i get them done i will post a pic,,
#100
one last thing in the install that is missing in every thread is, a bumpstop for up travel,, you should have them or shock damage can occur when they bottom out,,
You have to make your own, I am in the process of designing a set for my Explorer, but when i get them done i will post a pic,,
You have to make your own, I am in the process of designing a set for my Explorer, but when i get them done i will post a pic,,


![55[1]](https://www.ranger-forums.com/rf/forum2/images/smilies/55[1].gif)


