How to: Install an Infinity Basslink powered subwoofer
#1
How to: Install an Infinity Basslink powered subwoofer
Here is how to install an Infinity Basslink powered subwoofer
Tools needed:
- A wiring kit of your choice
- A hand ratchet
- Assorted sockets
- A cordless drill with a stepbit
- A rubber grommet
- A fresh razorblade
- A sheet of MDF
- Wood cutting tools of your choice
- Woodscrews
- 1"x1" for the base
- A coutersink tool for the drill
- Carpeting for the mount
- Spray glue
- A staple gun
- A small piece of rough sandpaper
- A couple sheetmetal screws
- Wire cutters
- Wire strippers
- A wire crimper
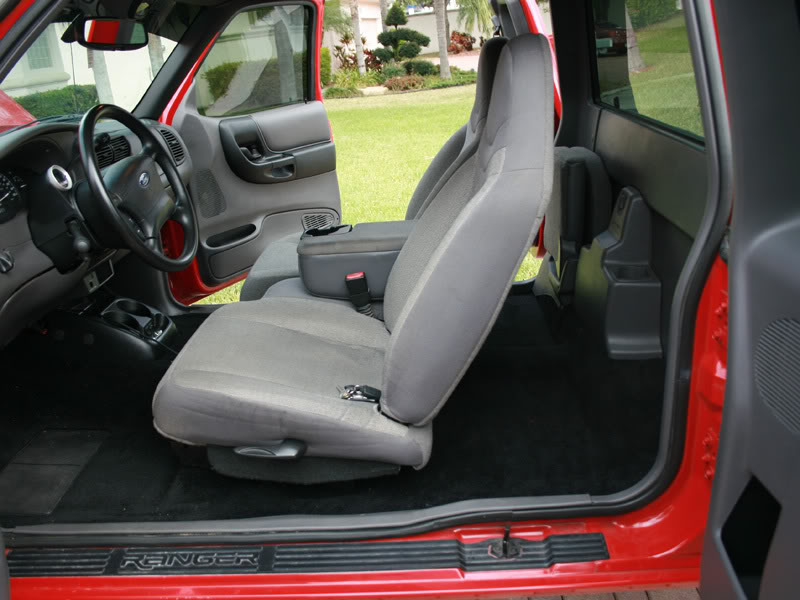
The rear jump seat I found to be useless so I had already removed it, I am too tall to be able to drive with someone sitting behind me. If you still have yours you will need to remove it.
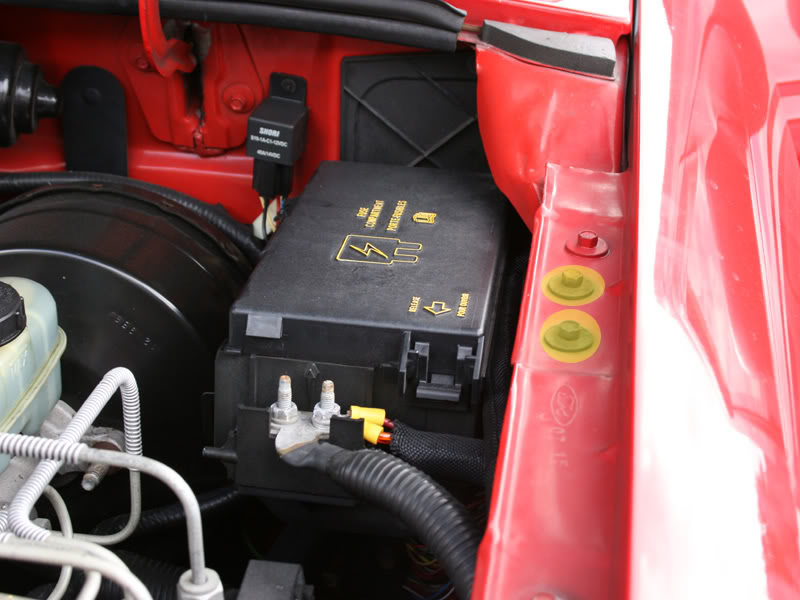
Now we are going to need a way to get power to the amplifier in the unit. We are going to need to drill a hole in the firewall for this, remove the fuse box pictured and you will be able to see where you can safely drill a hole.
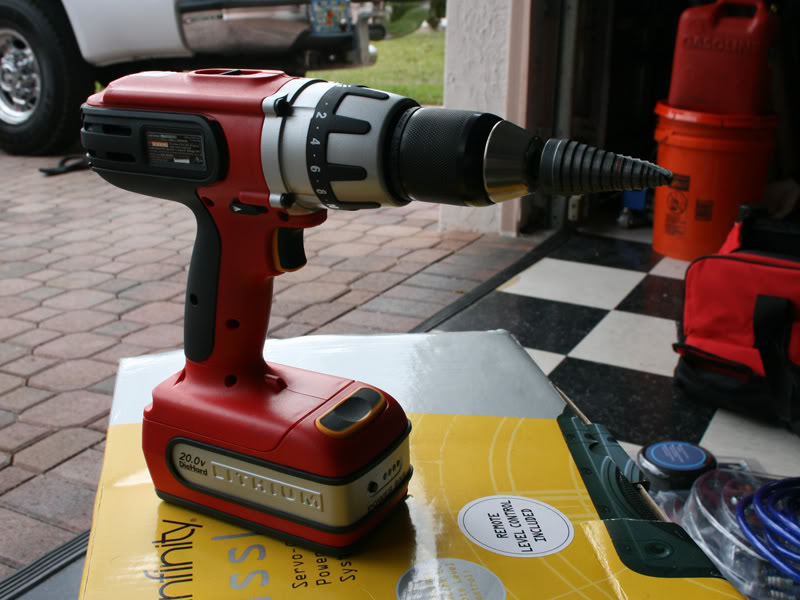
To drill the hole use a step drill bit, it will drill through it like butter. You can use tape or a marker to mark the bit so you know when to stop.
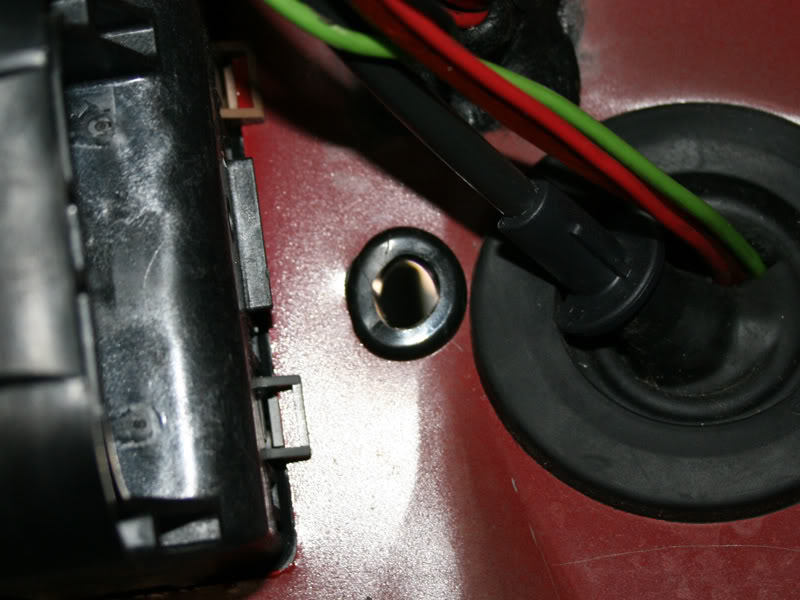
The hole is drilled, do not forget to use a rubber grommet. If you don't use one your wire will chafe and short. You can pick up a small box for a few bucks at a local hardware store.
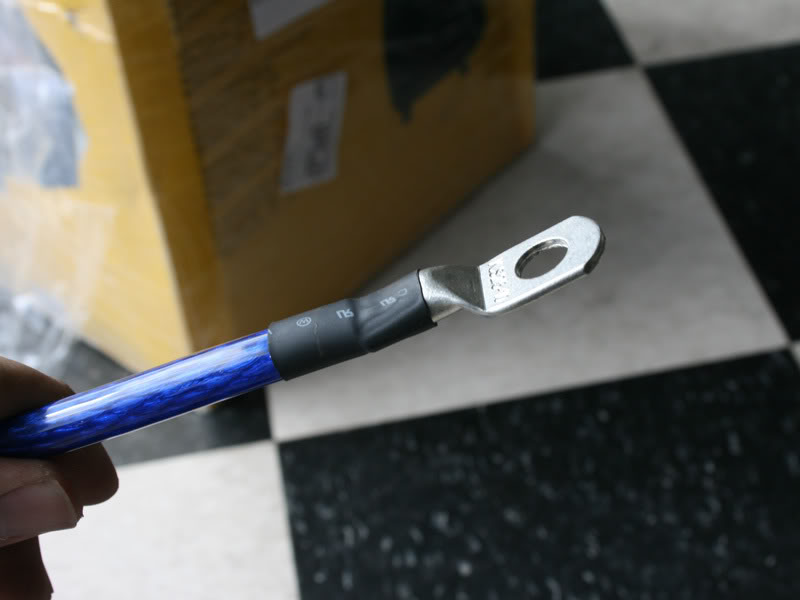
Before you run your wire you will need to add a ring terminal to the end of it. Strip the wire with a sharp razor blade, slide a piece of shrink tubing over the wire, slide the terminal on, then use a chisel and a hammer to crimp it. There are other methods you can use but this is the one I prefer, just put the chisel on the terminal and give it a few good whacks. Then slide the heat shrink over it and shrink it.
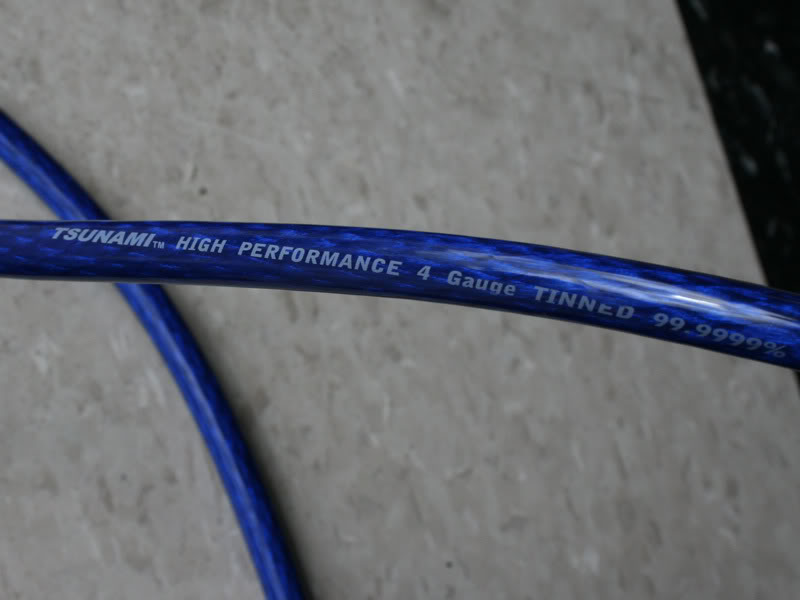
Use a quality wiring kit, I used a Tsunami dual amp kit since I plan on later adding another amp and the kit came with everything I need. The kit uses 4awg power wire, but if you are only doing a Basslink you can use 8awg.
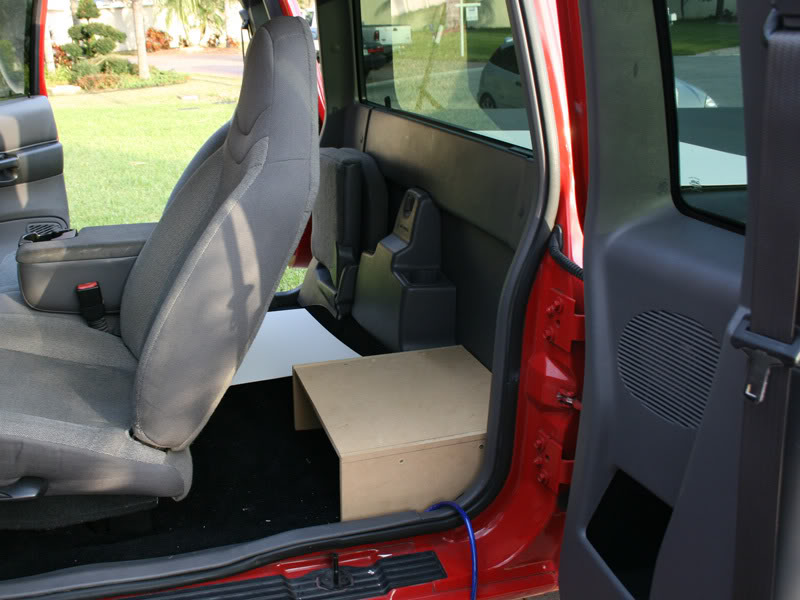
Bolting the unit straight to the floor would look stupid and horrible. Use MDF to build a mounting base. You can use cardboard to make the mount and to test how well it will fit, then trace the pieces on the MDF and cut them out with a jigsaw. Also run your power wire under the carpet to the box, just remove and then reinstall the trim panels to do this.
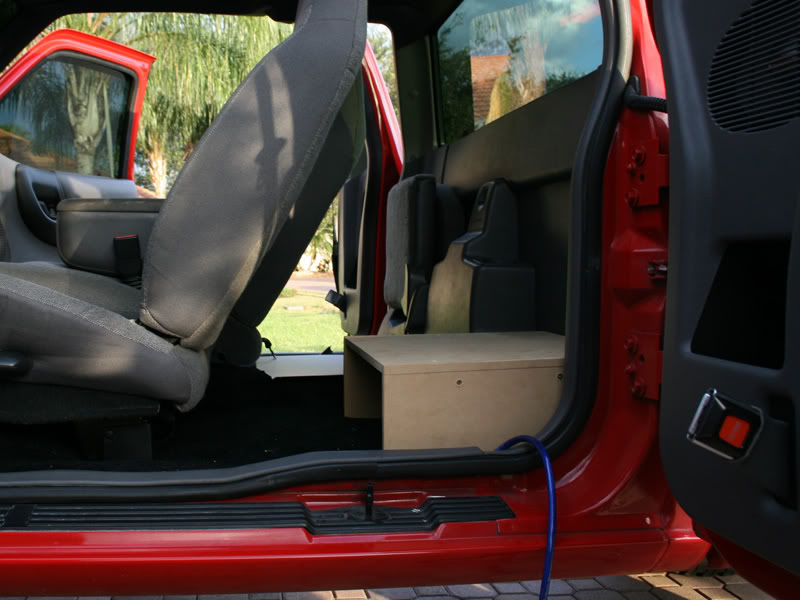
Another picture of how it will sit.
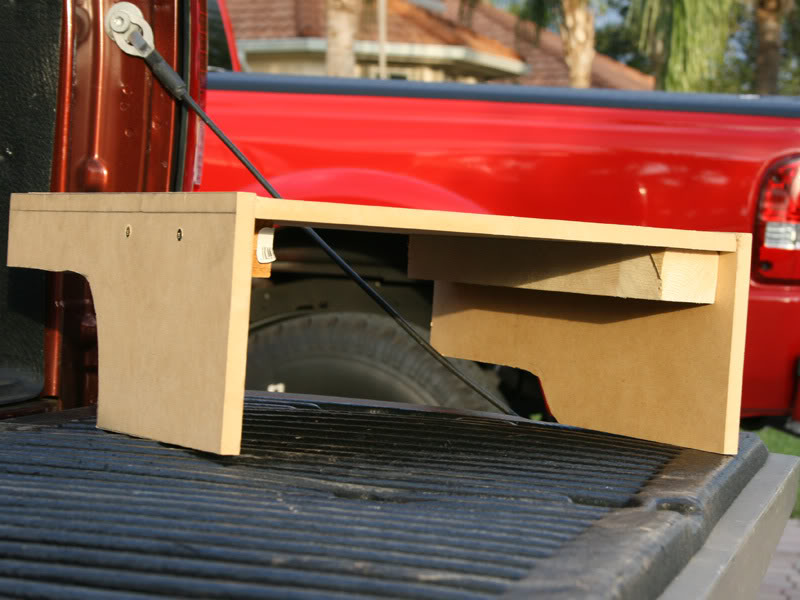
Here is what it looks like, your cuts don't have to be pretty since the carpet will cover them up.
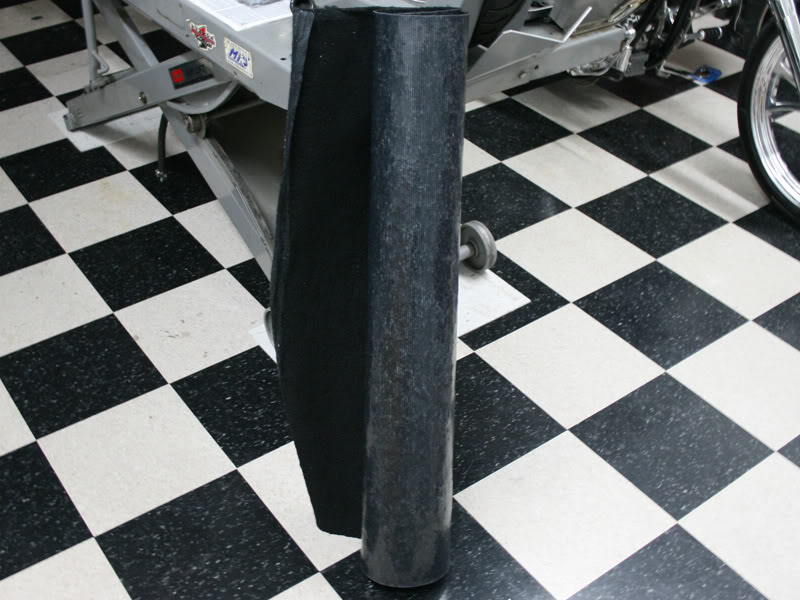
Since my carpet came from www.stockinteriors.com I got a roll of carpet from them to use on the box. This way the carpet will be a 100% match and look as OEM as possible.
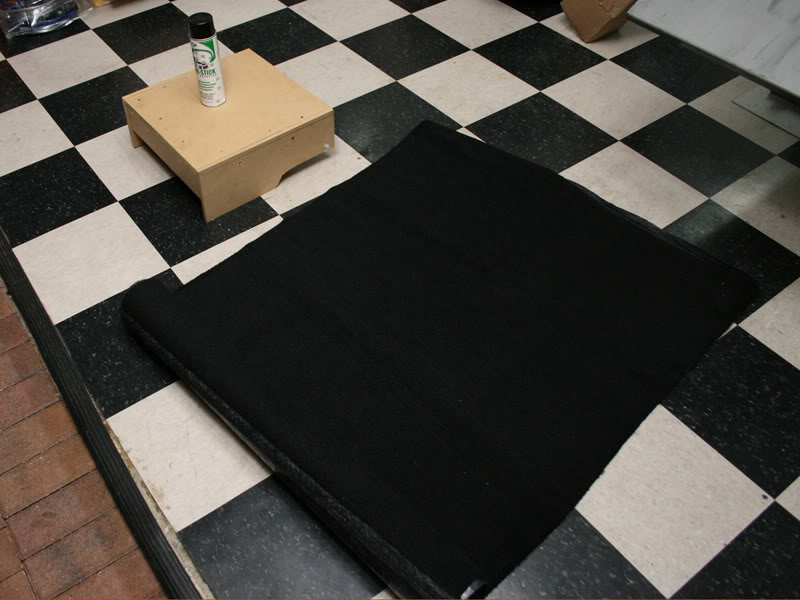
To carpet the box you will need spray adhesive as well as a (not pictured) staple gun and staples. You can also see I added a small piece of MDF to the front of the mount after rethinking my original idea. Carpeting the box is somewhat tricky but is not too bad. Here is how I learned how to carpet the box correctly, I suggest you watch it.
http://www.icixsound.com/iv/view_vid...5a1a4a6e1b9770
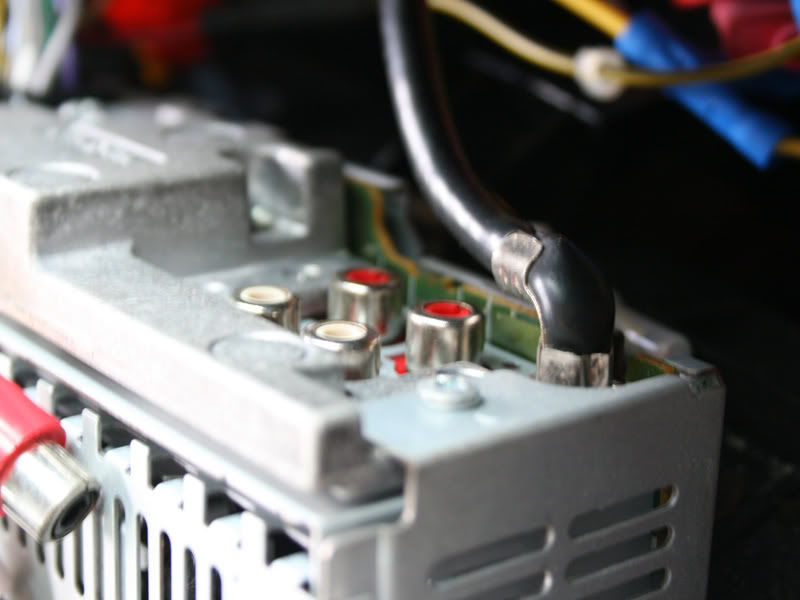
With the box out of the way not it is time to run signal wires. Most aftermarket stereos will have RCA subwoofer outputs on the back as pictured here.
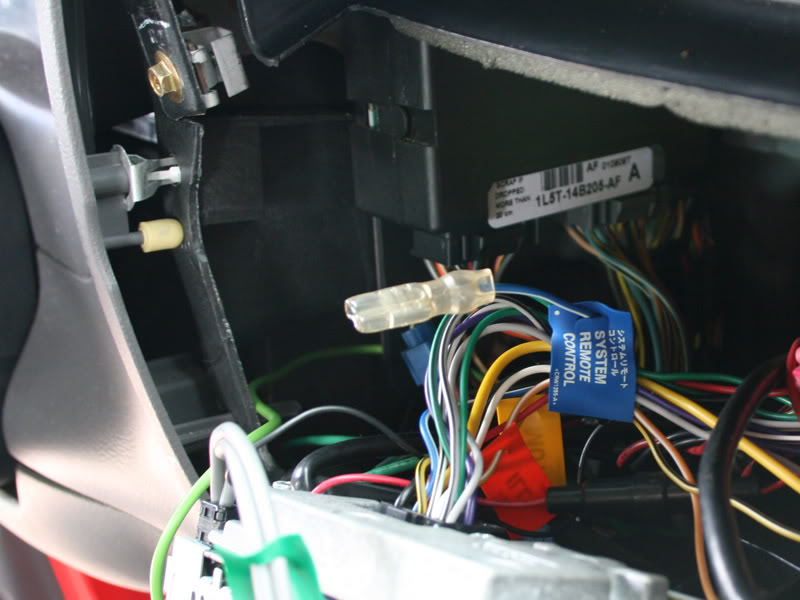
The unit also has to know when to turn on, the remote wire will take care of this.
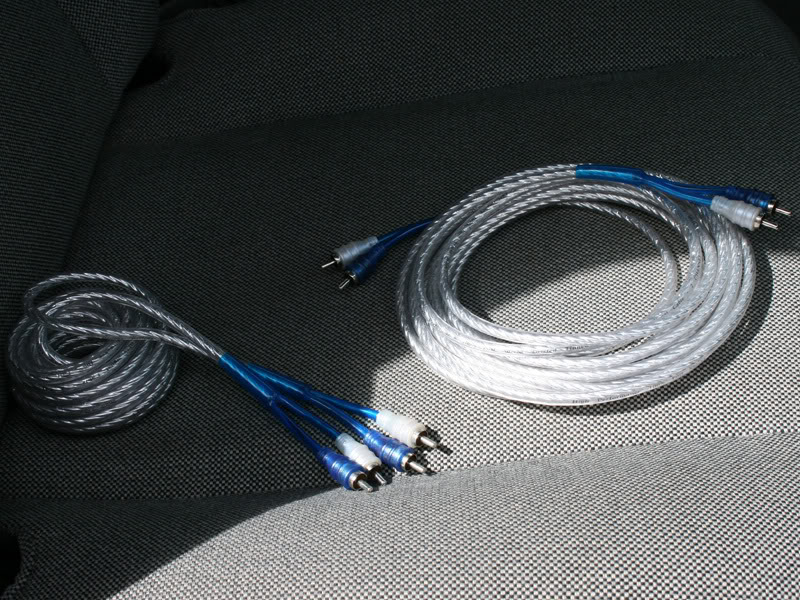
Again, use a quality cable. These are shielded cables that came with the Tsunami kit, only one cable will be needed.
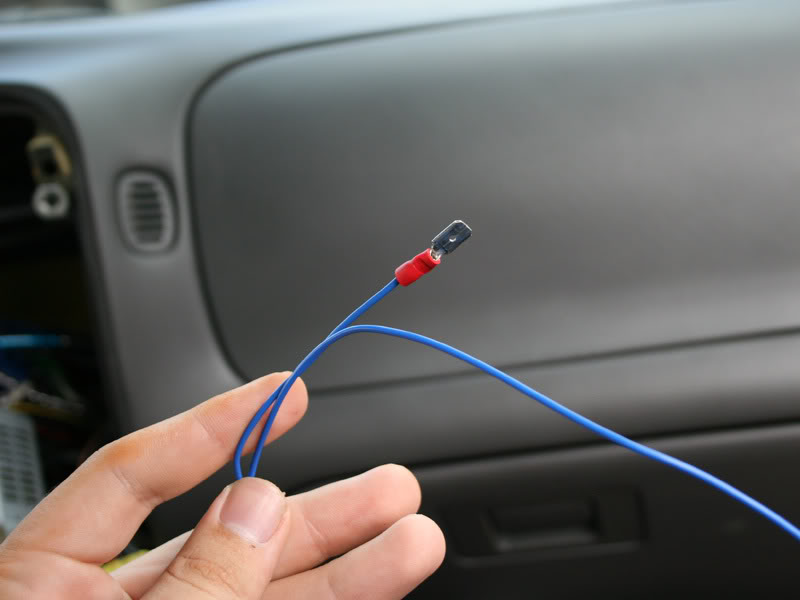
The kit also comes with a remote turn on wire, you can use a butt connector for this but I used a different male one since my remote output had a female connector on it already.
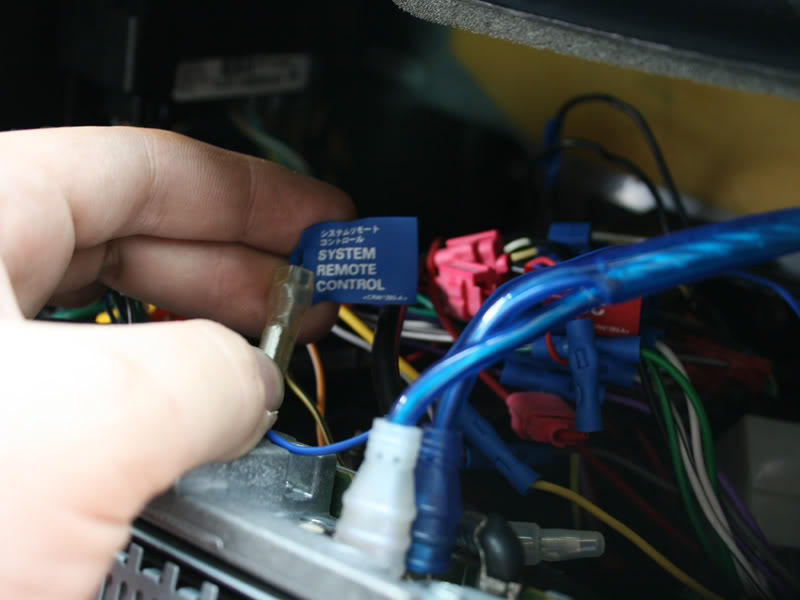
Connect the wires.
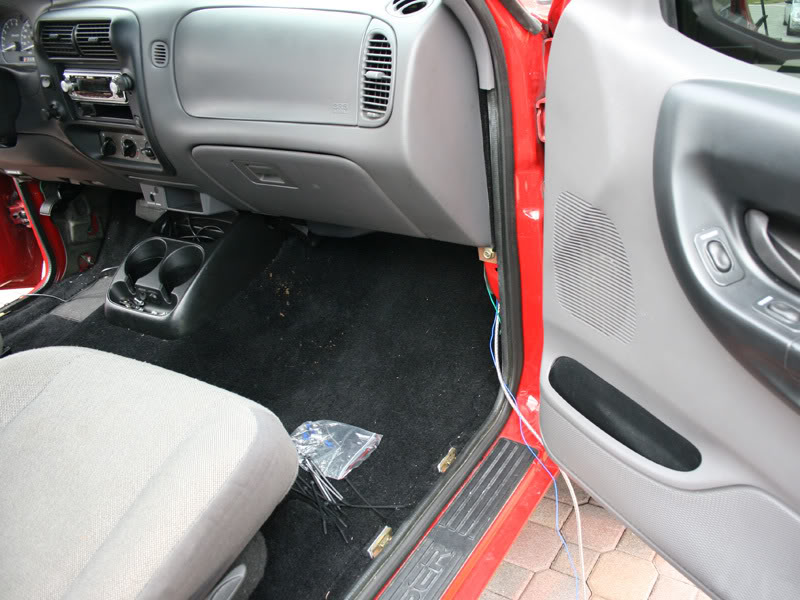
Always run the signal wire(s) down the opposite side as the power cable. Remove the trim panels and run the wire.

Keep running the wire back under the carpet until you get to the spot where the mount is.
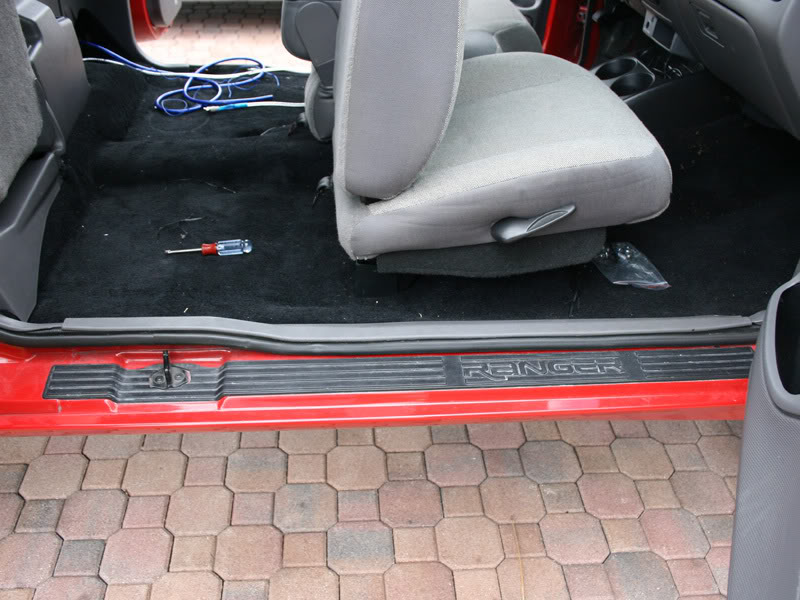
Reinstall trim.
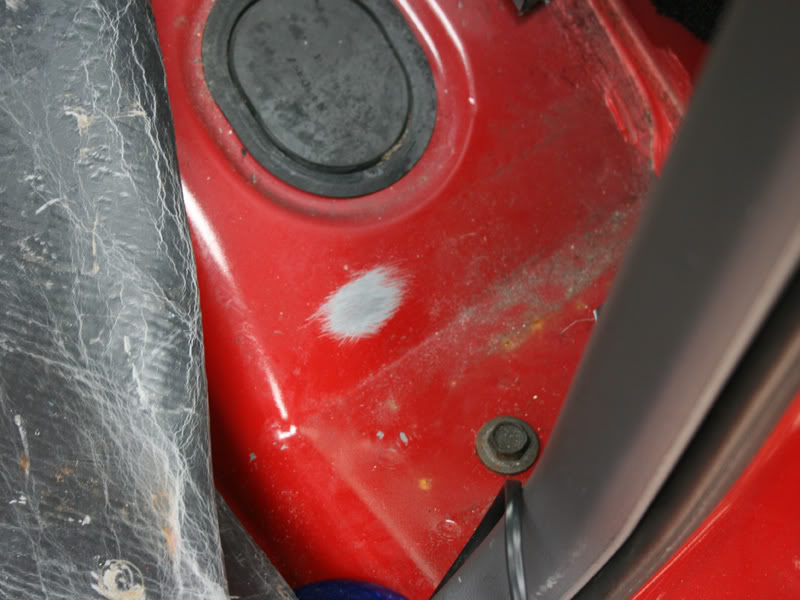
Your going to need a ground too, use some sandpaper to remove the paint in the spot where you want your ground to be.

I used a self cutting/tapping screw to secure the terminal.
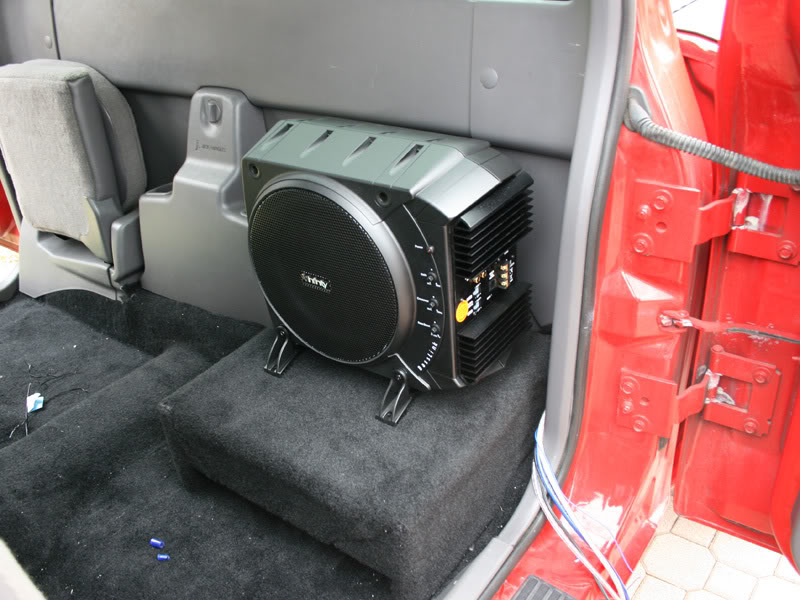
Now put the base back and then put the Basslink on top of it and line it up to where you would like it.
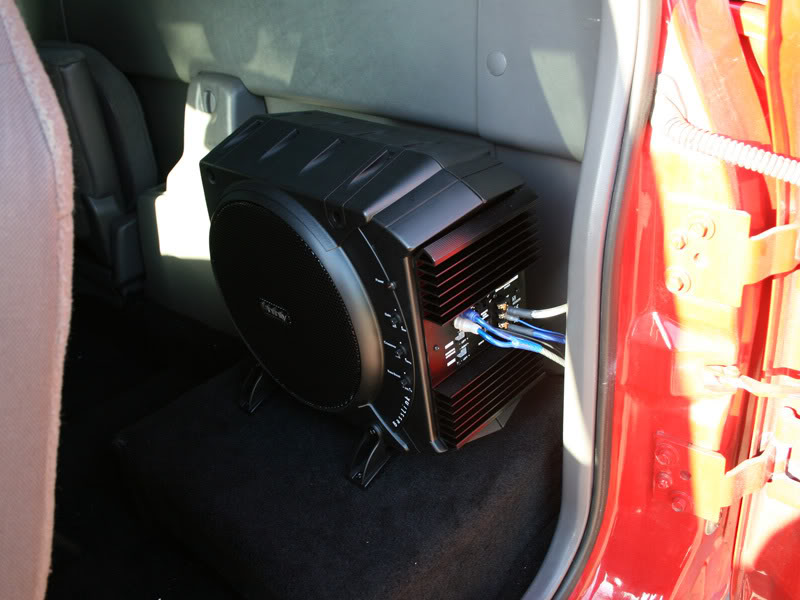
Use the included screws to secure the Basslink to the mount. Also strip and attach the appropriate terminals to the ends of the wires once you cut them to length. All of these terminals are included with the Tsunami amp install kit.
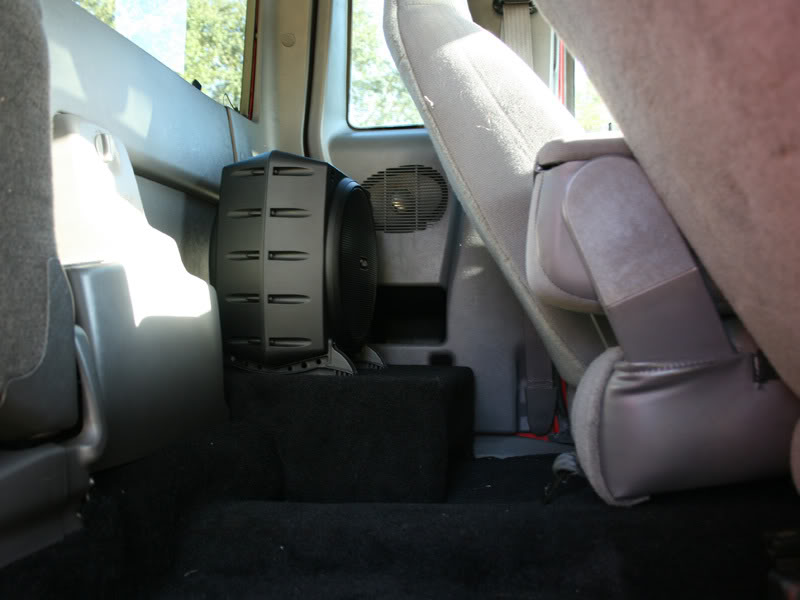
Here is how it looks when done, from another angle.
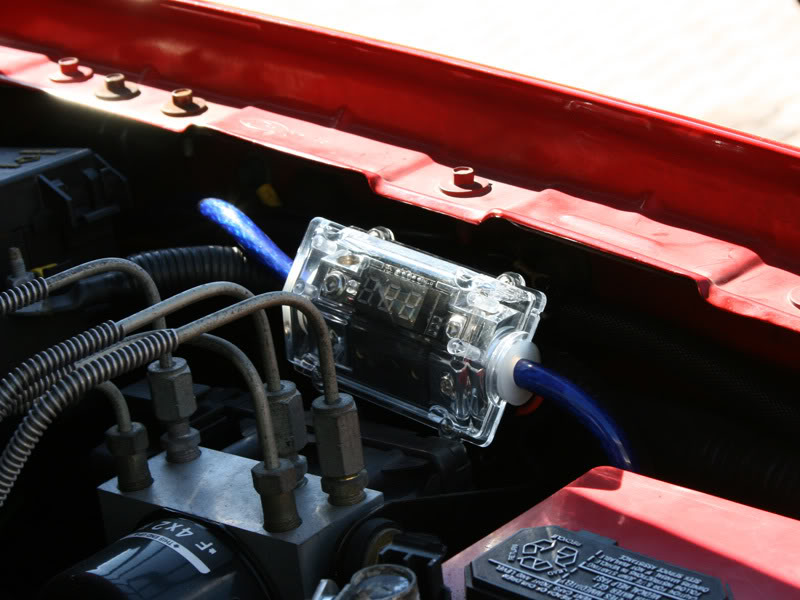
Now install your inline fuse, install it as close to the battery as possible. Any wire before the fuse is unprotected. This fuse also displays volts, some may like this but I chose to swap it out for a plain fuse holder shortly after installing it.

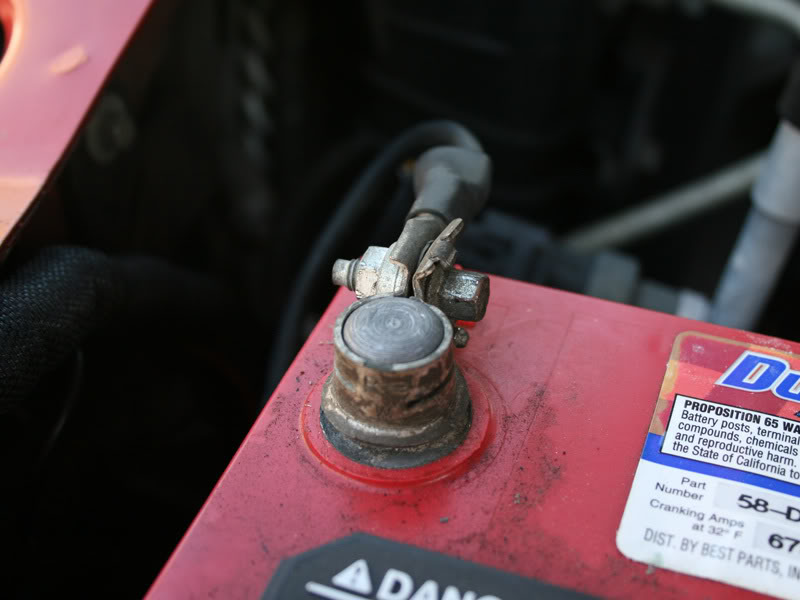
Connect power and ground on the battery and you are almost done!
Now, follow the instructions on how to tune the built in amplifier as well as turn on the HPF on your headunit so you can block bass from your speakers and send it only to the subwoofer. This process takes only a minute or two and when you are done you are ready to enjoy some bass!
Also, it is optional but included in the box is a remote level adjustment, this connects using a cable similar to a phone cable and can be placed wherever you would like.

Tools needed:
- A wiring kit of your choice
- A hand ratchet
- Assorted sockets
- A cordless drill with a stepbit
- A rubber grommet
- A fresh razorblade
- A sheet of MDF
- Wood cutting tools of your choice
- Woodscrews
- 1"x1" for the base
- A coutersink tool for the drill
- Carpeting for the mount
- Spray glue
- A staple gun
- A small piece of rough sandpaper
- A couple sheetmetal screws
- Wire cutters
- Wire strippers
- A wire crimper

The rear jump seat I found to be useless so I had already removed it, I am too tall to be able to drive with someone sitting behind me. If you still have yours you will need to remove it.

Now we are going to need a way to get power to the amplifier in the unit. We are going to need to drill a hole in the firewall for this, remove the fuse box pictured and you will be able to see where you can safely drill a hole.

To drill the hole use a step drill bit, it will drill through it like butter. You can use tape or a marker to mark the bit so you know when to stop.

The hole is drilled, do not forget to use a rubber grommet. If you don't use one your wire will chafe and short. You can pick up a small box for a few bucks at a local hardware store.

Before you run your wire you will need to add a ring terminal to the end of it. Strip the wire with a sharp razor blade, slide a piece of shrink tubing over the wire, slide the terminal on, then use a chisel and a hammer to crimp it. There are other methods you can use but this is the one I prefer, just put the chisel on the terminal and give it a few good whacks. Then slide the heat shrink over it and shrink it.

Use a quality wiring kit, I used a Tsunami dual amp kit since I plan on later adding another amp and the kit came with everything I need. The kit uses 4awg power wire, but if you are only doing a Basslink you can use 8awg.

Bolting the unit straight to the floor would look stupid and horrible. Use MDF to build a mounting base. You can use cardboard to make the mount and to test how well it will fit, then trace the pieces on the MDF and cut them out with a jigsaw. Also run your power wire under the carpet to the box, just remove and then reinstall the trim panels to do this.

Another picture of how it will sit.

Here is what it looks like, your cuts don't have to be pretty since the carpet will cover them up.

Since my carpet came from www.stockinteriors.com I got a roll of carpet from them to use on the box. This way the carpet will be a 100% match and look as OEM as possible.

To carpet the box you will need spray adhesive as well as a (not pictured) staple gun and staples. You can also see I added a small piece of MDF to the front of the mount after rethinking my original idea. Carpeting the box is somewhat tricky but is not too bad. Here is how I learned how to carpet the box correctly, I suggest you watch it.
http://www.icixsound.com/iv/view_vid...5a1a4a6e1b9770

With the box out of the way not it is time to run signal wires. Most aftermarket stereos will have RCA subwoofer outputs on the back as pictured here.

The unit also has to know when to turn on, the remote wire will take care of this.

Again, use a quality cable. These are shielded cables that came with the Tsunami kit, only one cable will be needed.

The kit also comes with a remote turn on wire, you can use a butt connector for this but I used a different male one since my remote output had a female connector on it already.

Connect the wires.

Always run the signal wire(s) down the opposite side as the power cable. Remove the trim panels and run the wire.

Keep running the wire back under the carpet until you get to the spot where the mount is.

Reinstall trim.

Your going to need a ground too, use some sandpaper to remove the paint in the spot where you want your ground to be.

I used a self cutting/tapping screw to secure the terminal.

Now put the base back and then put the Basslink on top of it and line it up to where you would like it.

Use the included screws to secure the Basslink to the mount. Also strip and attach the appropriate terminals to the ends of the wires once you cut them to length. All of these terminals are included with the Tsunami amp install kit.

Here is how it looks when done, from another angle.

Now install your inline fuse, install it as close to the battery as possible. Any wire before the fuse is unprotected. This fuse also displays volts, some may like this but I chose to swap it out for a plain fuse holder shortly after installing it.


Connect power and ground on the battery and you are almost done!
Now, follow the instructions on how to tune the built in amplifier as well as turn on the HPF on your headunit so you can block bass from your speakers and send it only to the subwoofer. This process takes only a minute or two and when you are done you are ready to enjoy some bass!
Also, it is optional but included in the box is a remote level adjustment, this connects using a cable similar to a phone cable and can be placed wherever you would like.

Last edited by Taylor; 11-21-2011 at 05:30 PM.
#2
nice write-up, thanks! 
does the stock head unit have outputs for a sub? or did you splice your signal off the rear speakers? also where did you connect the remote wire?
also how are the rattles? too many questions i know lol. im thinking with a floor mounted sub there would be less rattle issues.

does the stock head unit have outputs for a sub? or did you splice your signal off the rear speakers? also where did you connect the remote wire?
also how are the rattles? too many questions i know lol.
 im thinking with a floor mounted sub there would be less rattle issues.
Here is the remote wire,
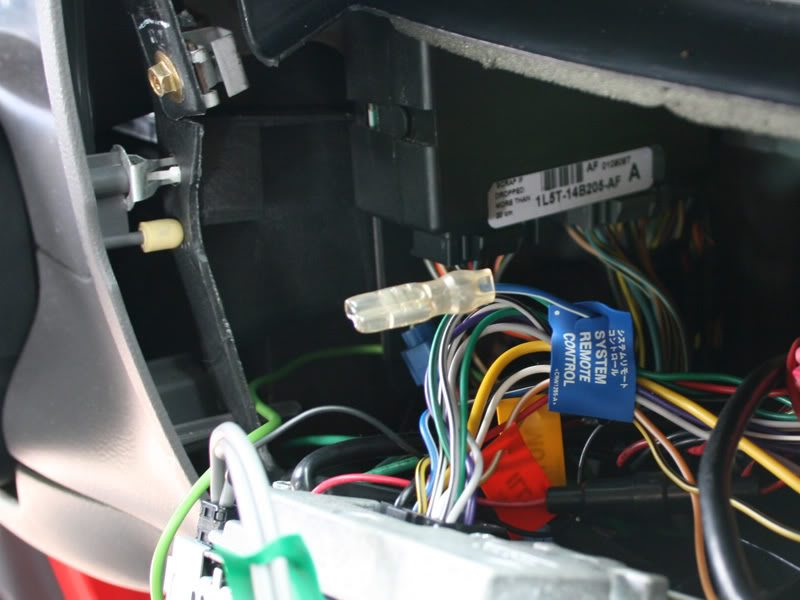
It doesn't rattle at all, which is also something I like about it. The only reason I could see it rattling would be if your rear drivers side door panel was loose.
Not too many questions, feel free to ask more.

Thread
Thread Starter
Forum
Replies
Last Post
mulatto325
OLD - Interior, Exterior, Electrical, & Misc.
6
12-07-2011 09:48 PM
redranger4.0
OLD - Interior, Exterior, Electrical, & Misc.
6
06-14-2009 05:27 PM
DviousDave
OLD - Interior, Exterior, Electrical, & Misc.
5
04-09-2009 12:20 PM


